Rich Text element
Get to know the rich text element in detail.
The Rich Text element is a powerful WYSIWYG editor that allows you to create formatted text on your snap. This means you can mix text styles like (font-size, font-weight, font-family, color, alignment, etc.)
Mode
In general we distinguish between Select and Edit mode.
Select mode
This is the mode when you just select the rich-text element. On the right-toolbar you’ll see the usual settings. If you change something, it will apply to the whole rich-text content.
Edit mode
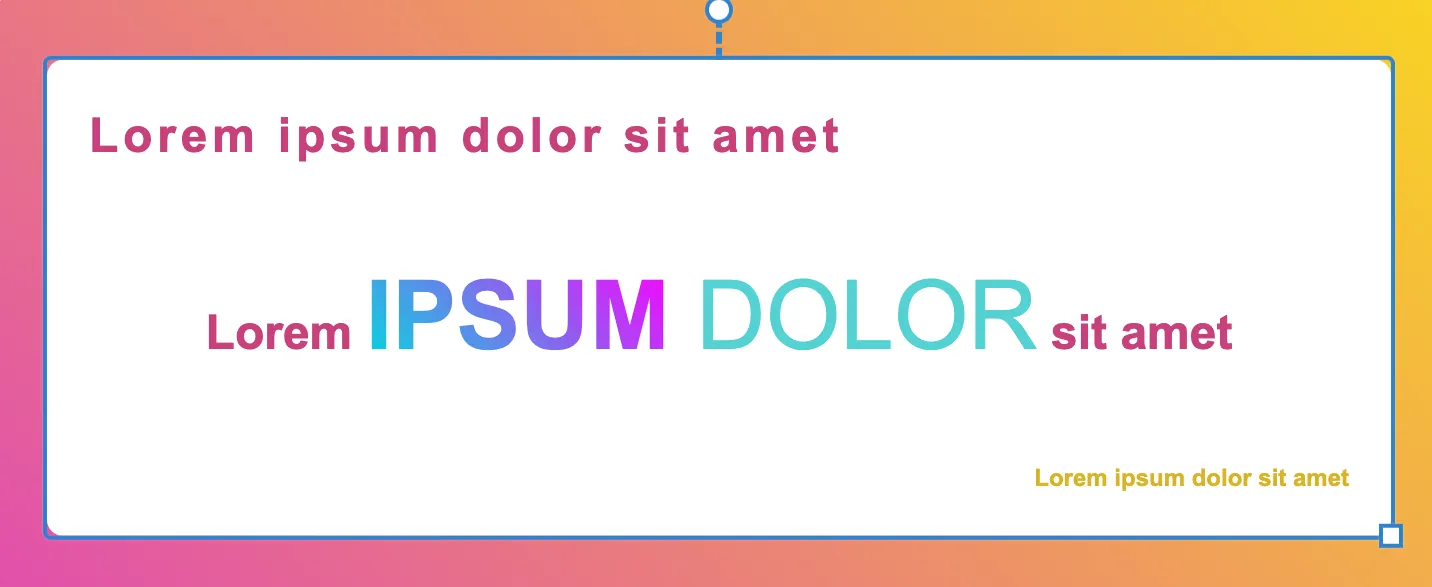
You’ll enter the edit mode when you double-click on the rich-text element. In this mode you can obviously edit the content. You can select a part of the text and change the settings for that part only (e.g. its color).
Inline toolbar
As soon as you enter the edit mode you’ll see the inline toolbar on the top of the rich-text element. You can change the font-size, font-weight, font-family, color, line-height and letter-spacing of the selected text.
Right toolbar
Let’s have a look at the right toolbar and what you can configure there.
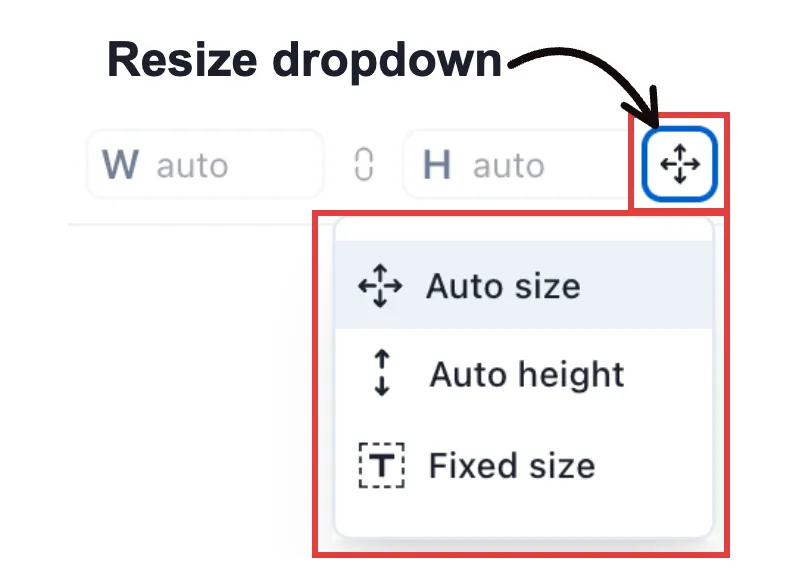
Resize mode
Initially the rich-text element is in Auto size mode. This means it will always grow with the content. If you want that the element has a fixed width and increase in height according to the content, you can switch to the Auto height mode. Or you can resize the element manually by dragging its resize handle on the canvas. In this case the rich-text element switches to Fixed size mode automatically.
Background
The background color can be applied to the whole rich text element the configured border-radius will apply to it.
Alignment
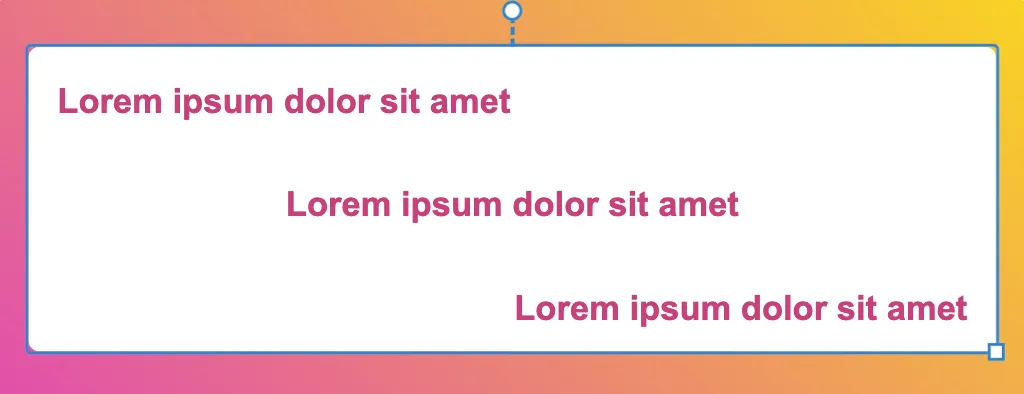
Of course the rich text element can be aligned to the left, center or right. But there is more to keep in mind. As already mentioned the rich text element is a powerful wysiwyg editor. This means you can align each paragraph individually. Here you see an example how this would look like:
Since the rich-text element can be resized bigger than the text content (more in next section), you can also align the text content vertically (top, middle or bottom).
Other settings
The other settings are pretty self-explanatory. You can change font-size, font-weight, font-family and color.
Again each of those settings can be applied to the whole rich-text content or to a part of the text only.
Advanced Styles
The rich-text elements supports the following advanced styles:
- Opacity
- Blur
- Rotation
- Tilting
- Border-radius (default: 8px)
- Box shadow
- Grayscale
- Sepia
- Hue rotation
Pro: Tip 💡
You can also apply a gradient color to the text.