Code Editor
Get to know the code editor element in detail.
The code editor is the core element of snappify. Doesn’t matter if you want to turn your code into a beautiful image, embed it on another website, or share it with anyone else - the code editor element let’s you present your code in many beautiful ways.
Let’s dive into it and see how it works 👇
Code Explanations
There’s a context-menu option which enables you to easily explain certain parts of your code snippets.
Just select a piece of code, right-click and select “Explain” from the context-menu. You can see how it works in the video below.
Video showing the new code explanation feature
When you add a new code explanation, three elements will be added to your canvas:
- A Rectangle, positioned excactly at your selected code
- A Rich-Text element, positioned right to the Rectangle and containing a placeholder text, ready for you to type in your explanation (just type Enter on your keyboard)
- An Arrow element, pointing from the Rich-Text to the Rectangle. It’s attached to both elements so when you e.g. move the Rich-Text element, the arrow will still point to the Rectangle and vice-versa
AI Explanations
On the context-menu of the Code Editor you’ll find a second menu item called “Explain with AI” which enables you to add explanations to your code snippets using our AI-powered solution.
It works the same as the normal Code Explanations described above, but our AI will generate an explanation for the code you’ve selected. You can then edit the explanation to your liking.
Depending on your Subscription Plan you’ll have several explanations available per month.
Video showing the AI code explanation feature
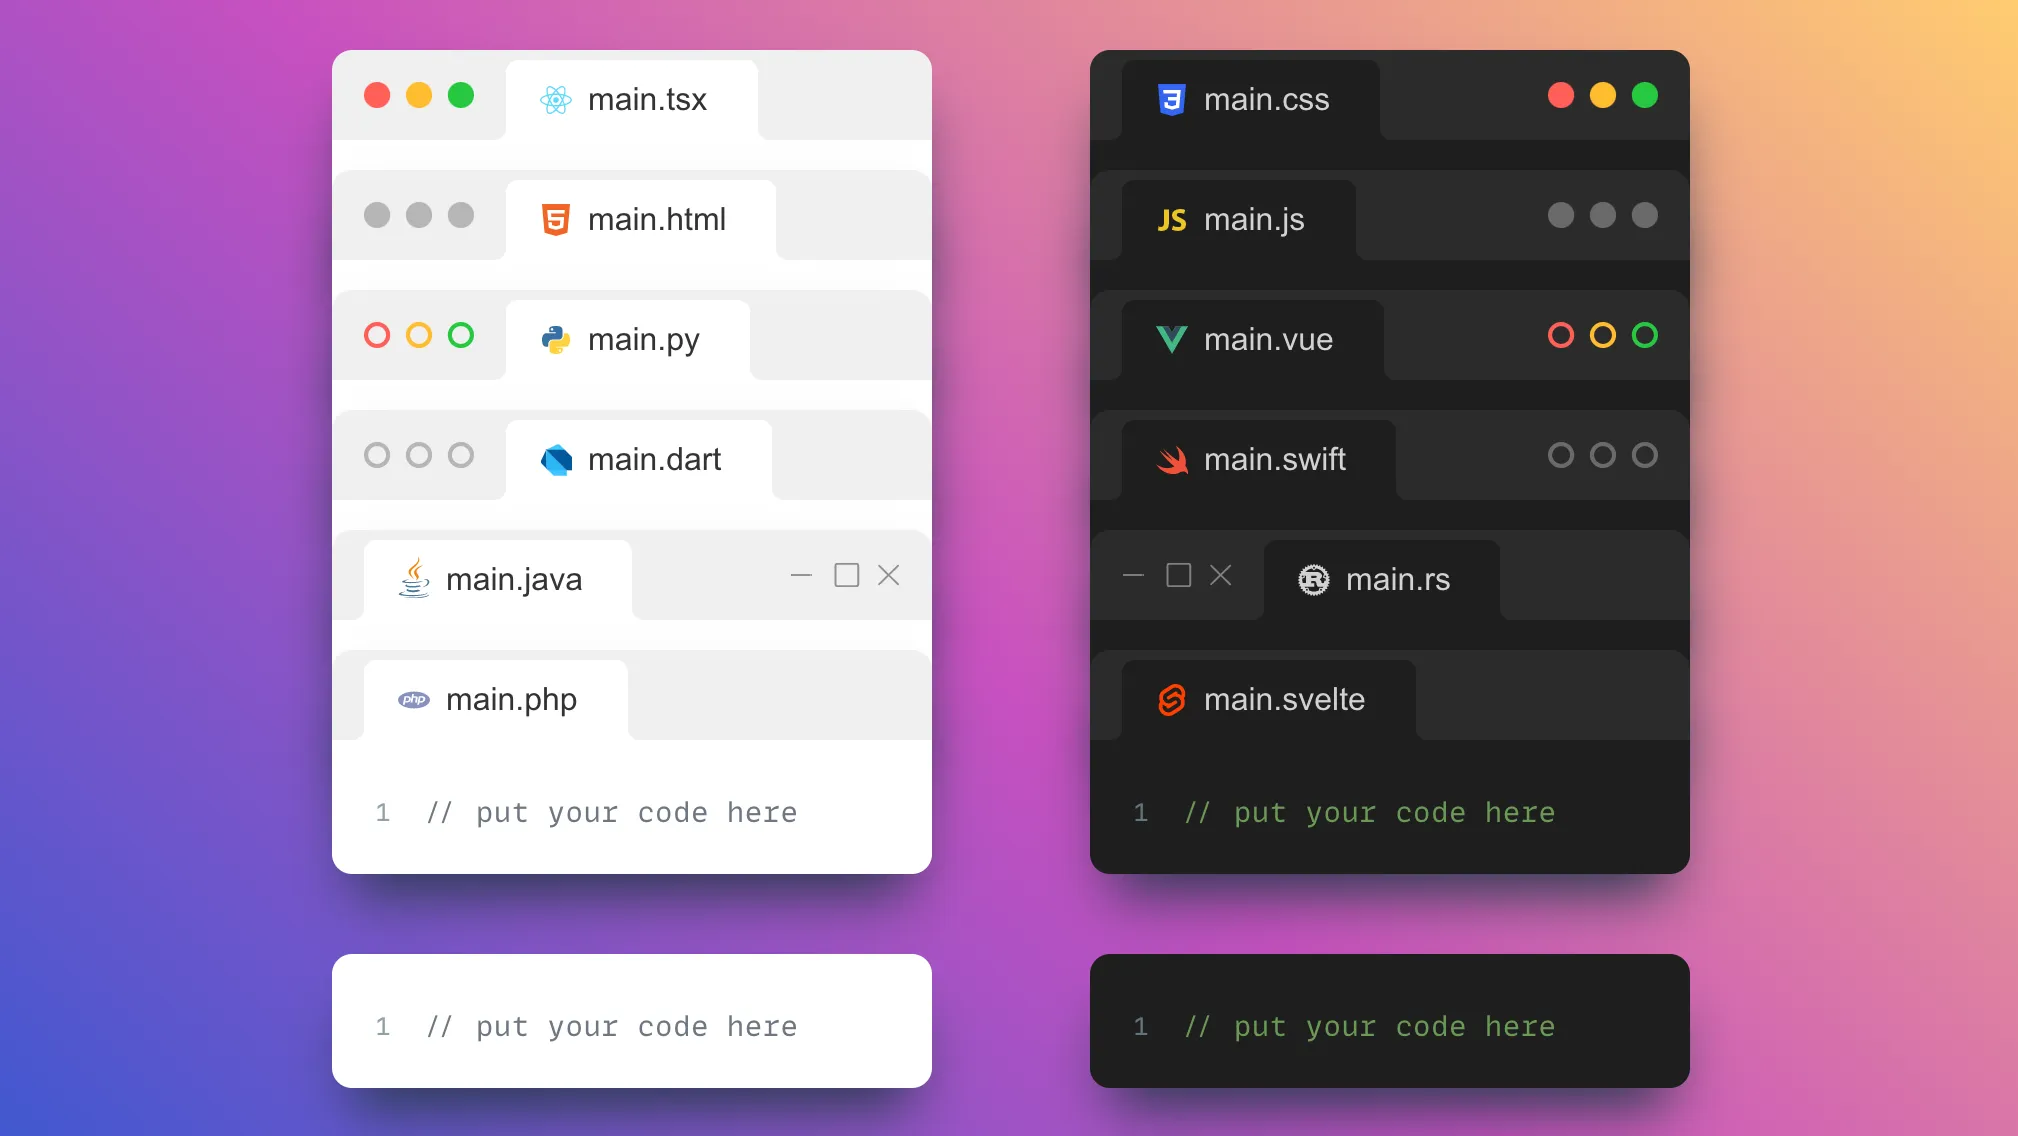
Filename
To display the filename of your code, simply click on the plus icon in the tab. If the file has a recognized extension, you’ll see the associated icon next to the filename.
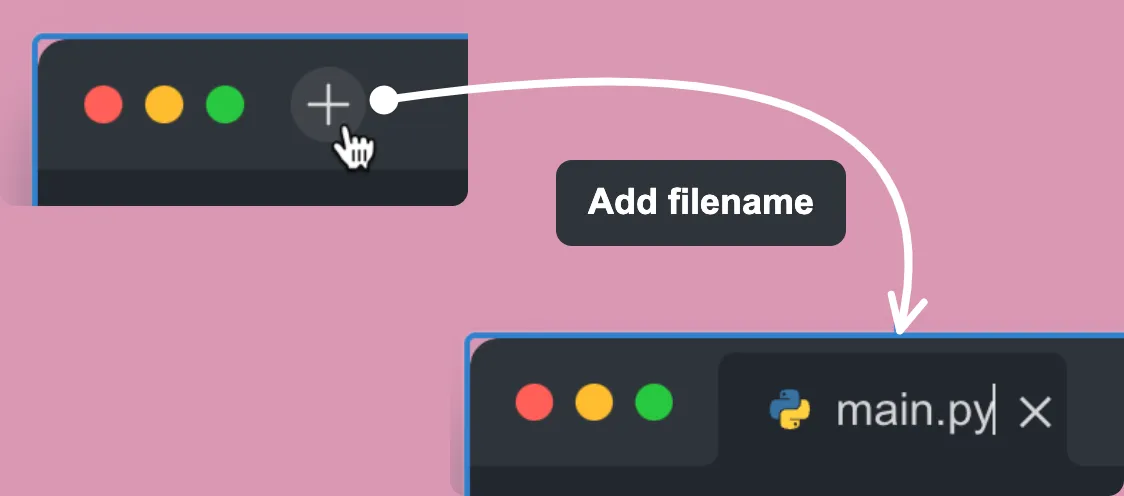
Note: The plus icon or the close icon won’t be visible when exporting an image, sharing the snap via the public link, or using iframe embedding.
Right toolbar
Let’s have a look at the right toolbar and what you can configure there.
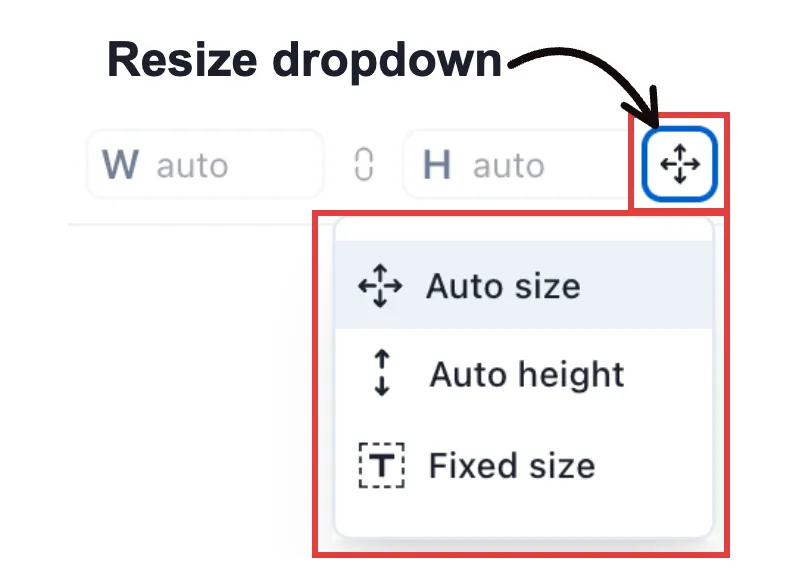
Resize mode
Initially the code-editor element is in Auto size mode. This means it will always grow with the content. If you want that the element has a fixed width and increase in height according to the content, you can switch to the Auto height mode. Or you can resize the element manually by dragging its resize handle on the canvas. In this case the code-editor element switches to Fixed size mode automatically.
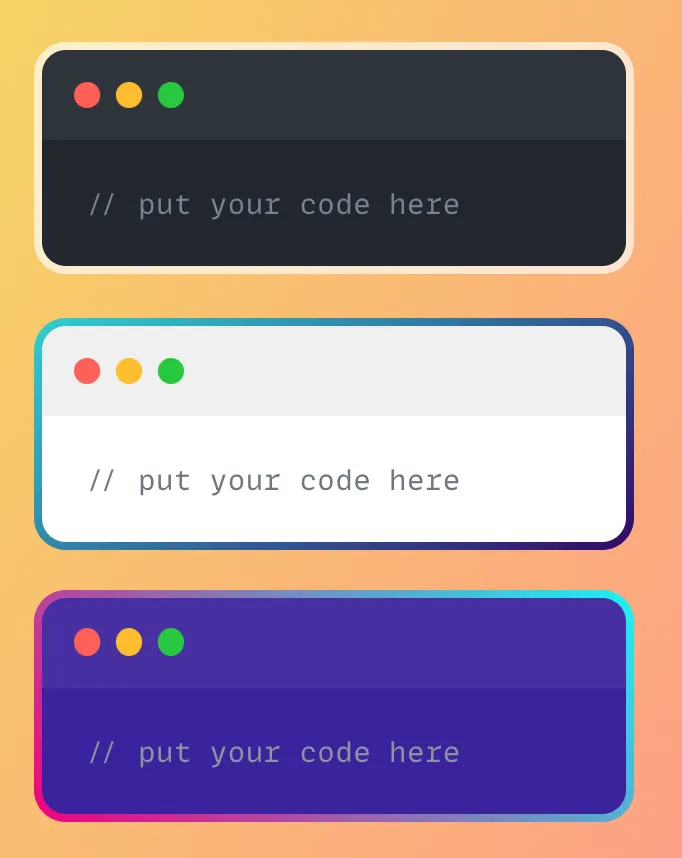
Editor color
The editor color is the background color of the code editor. Each theme has a default editor color, but you can customize it to any color you prefer. Gradient colors and colors with transparency (alpha channel) are also supported. You can experiment with different colors to find the one that works best for you.
Border
You can adjust the border of the code editor to achieve even more unique styles.
Programming Language
The syntax highlighting in your code is based on the programming language you’re using. Right now, the system doesn’t automatically detect the language, so you’ll need to select it manually.
Theme
To customize the appearance of your code editor, select a theme from the “Theme” dropdown menu. This will change the background color and the colors used for syntax highlighting of the code-editor.
Pro: Tip 💡
For skimming through the themes quickly, you can focus the “Theme” dropdown and press the UP or DOWN arrow keys.
Font
The default font for our code editor is the popular MonoLisa font, but you have the option to choose from other fonts as well. We regularly add new fonts to our system, so you can always find the perfect font for your code.
You can also customize the font size and enable font ligatures (if the font supports it) to suit your preferences.
Line numbers
If you prefer to have line numbers in your code, you can enable line numbering in the code editor and specify the starting number for the line count.
Tab size
By default the tab size is set to 2 spaces. You can change the tab size up to 6 spaces.
Window tab
Even though the code editor window tab is the most prominent design aspect of our product, we still offer plenty of options for customizing it!
For example, you can use the “Show accent” switch to change the accent color of the window tab. Or, if you want to hide the window tab completely, you can use the upper switch to do that.
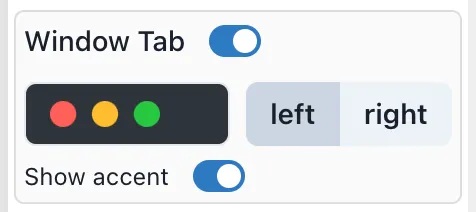
We also offer a variety of window controls to customize the look and feel of your code editor.
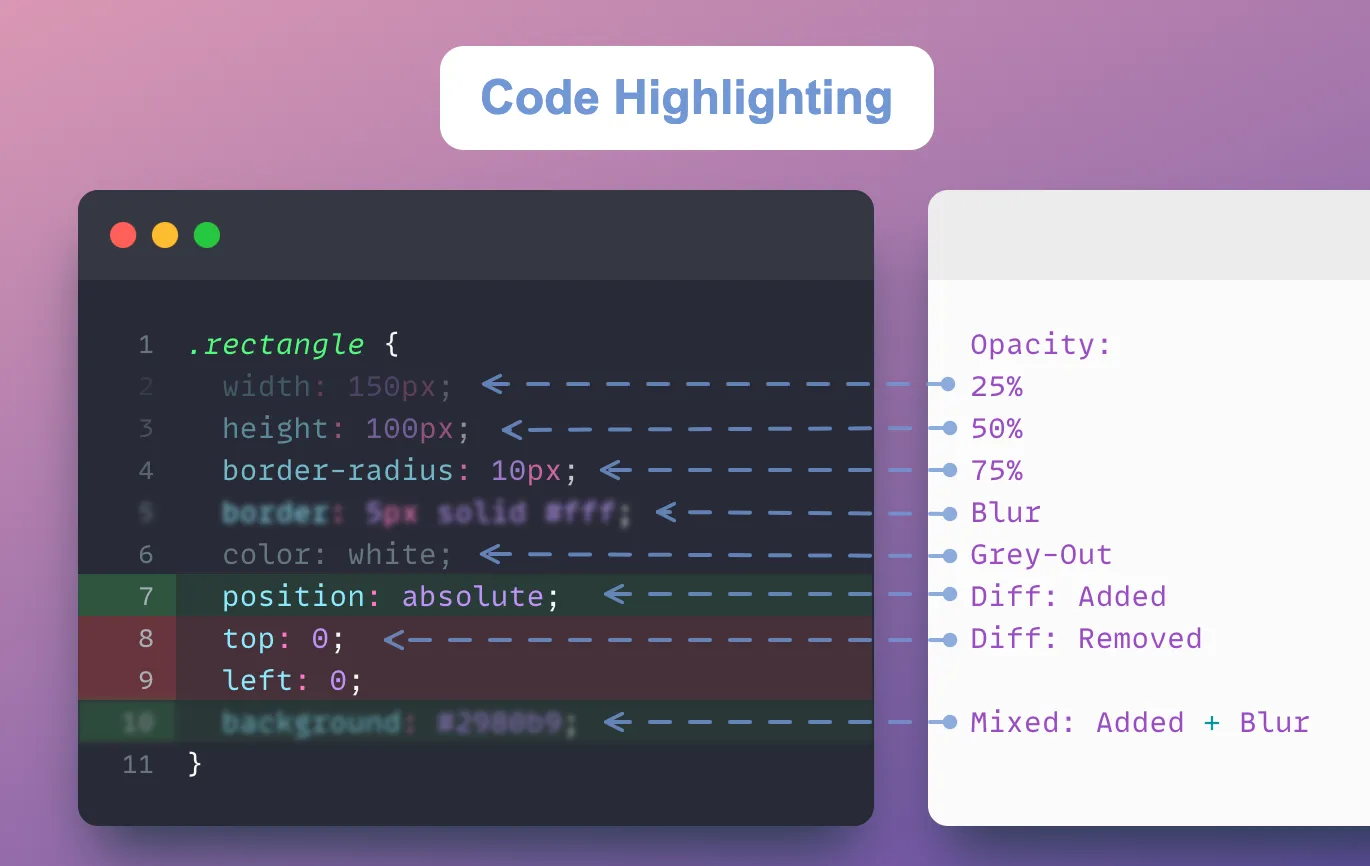
Code highlighting
Enhance the presentation of your code with our line highlighting feature. Simply select the lines you want to highlight and choose from our range of highlighting options.
- Opacity: 25%, 50%, 75% or 100% (default)
- Filter: Blur or Gray-Out
- Diff: Added or Removed
Format code
Our code formatter can help you format your code quickly and easily. Simply click on the “Format Code” button or use the keyboard shortcut to access it. ( Ctrl + S)
Advanced Styles
The code-editor elements supports the following advanced styles:
- Opacity
- Blur
- Scale
- Rotation
- Tilting
- Border-radius (default: 10px)
- Box shadow
- Grayscale
- Sepia
- Hue rotation
Animation options
When using the code editor element in snappify Slides, we’ll provide you with several options to smoothly animate code changes between Slides.
Checkout the different Animation options available.
Previous Article
Next Article