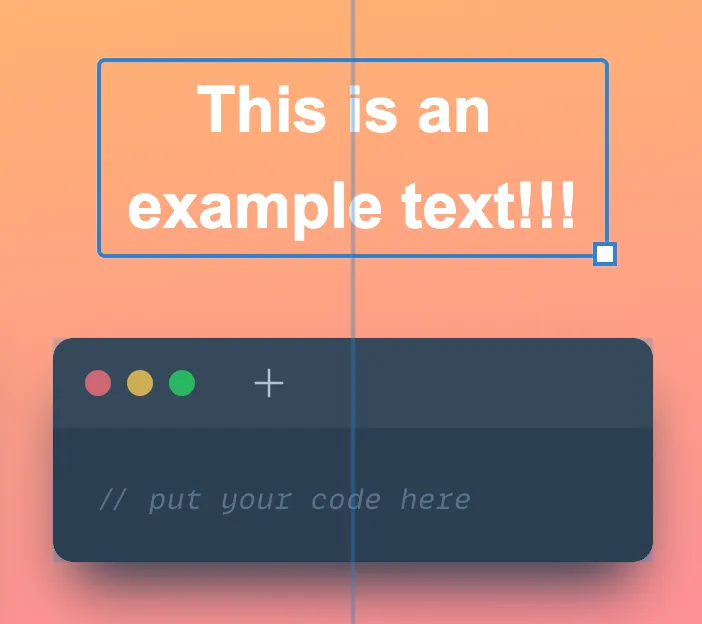
Snapping guidelines is a must for a graphic design tool. But Sometimes you want to position elements freely per drag. Now you can do that! Just hold
Ctrl
to disable the snapping guideline.
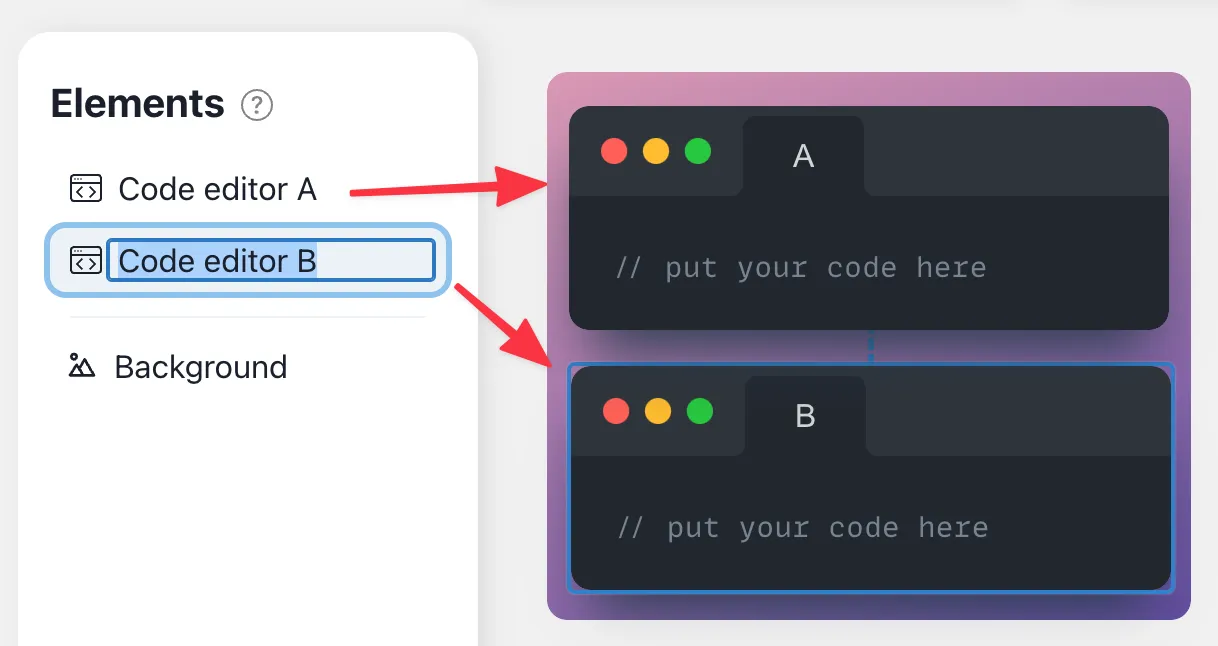
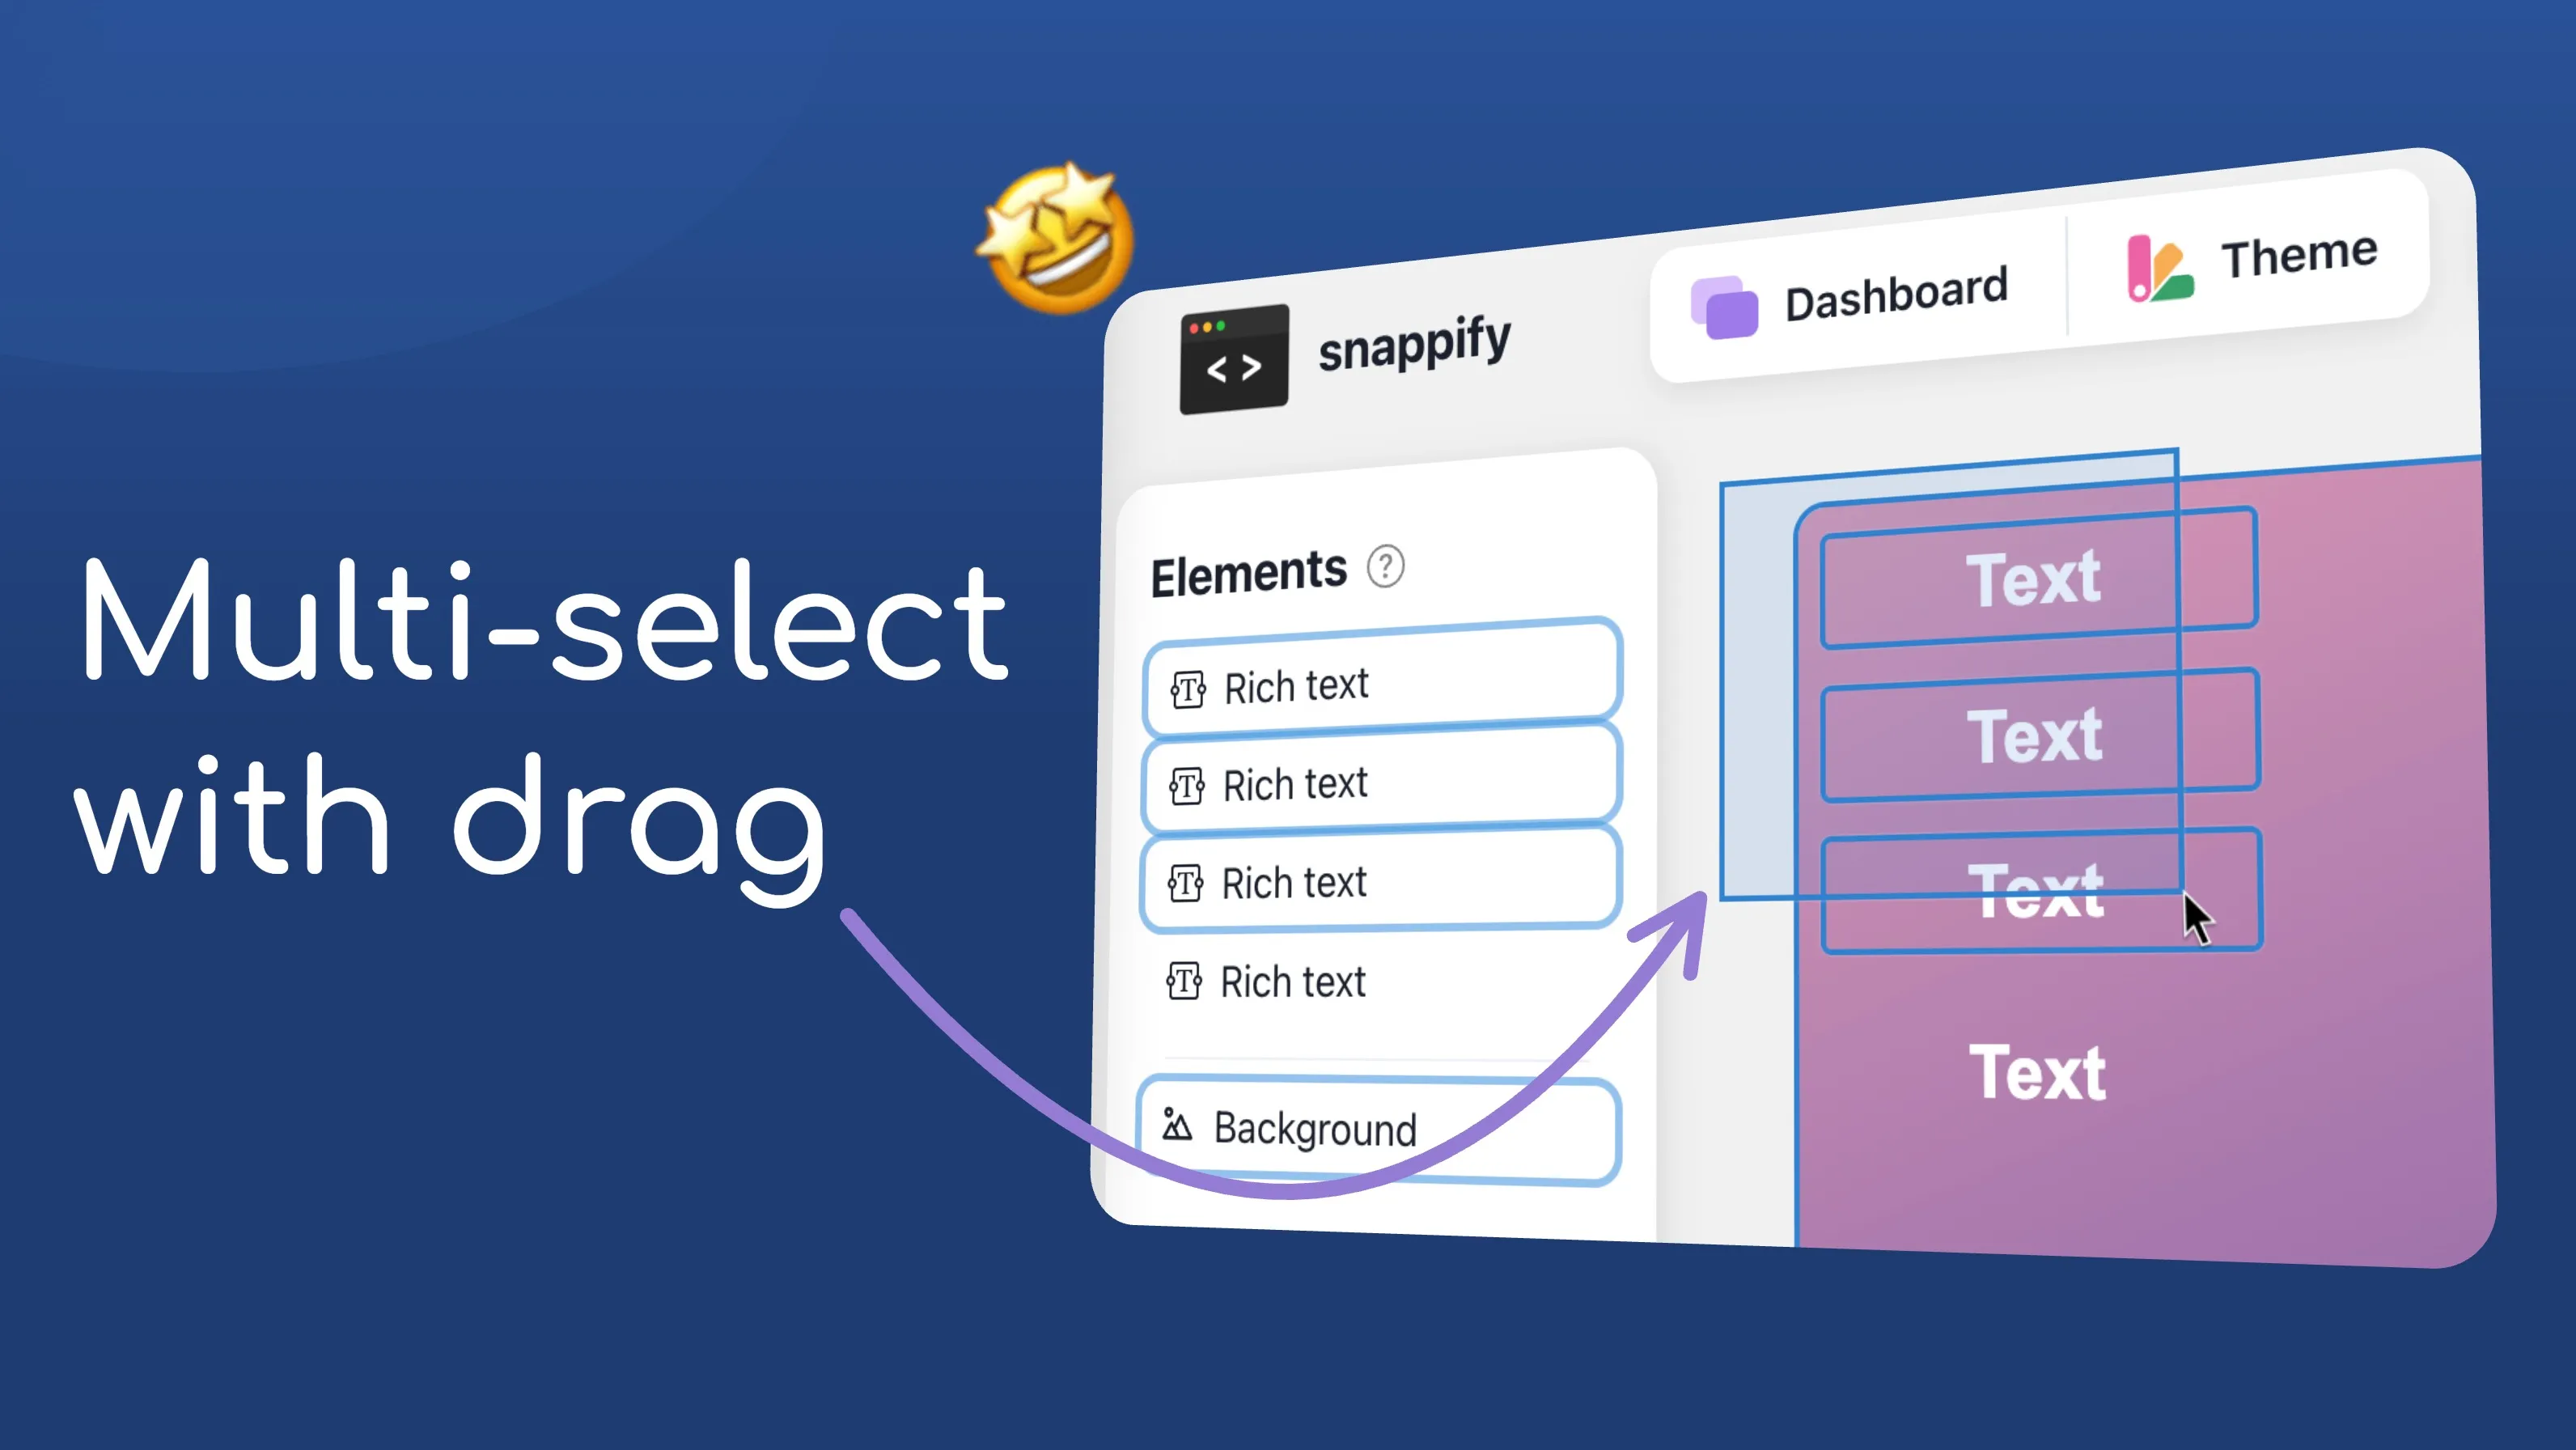
As part of these changes, we also changed how you can multi-select elements on canvas individually. You can either select multiple elements with Shift-Click or per drag-select.
Elements list improvements
We polished the UI of the elements list (left toolbar) and also improved the UX for better distinction of the hover and selected state to the elements.
In addition to existing elements selection by pressing
Ctrl
and click, we also support selecting multiple elements with Shift-Click.
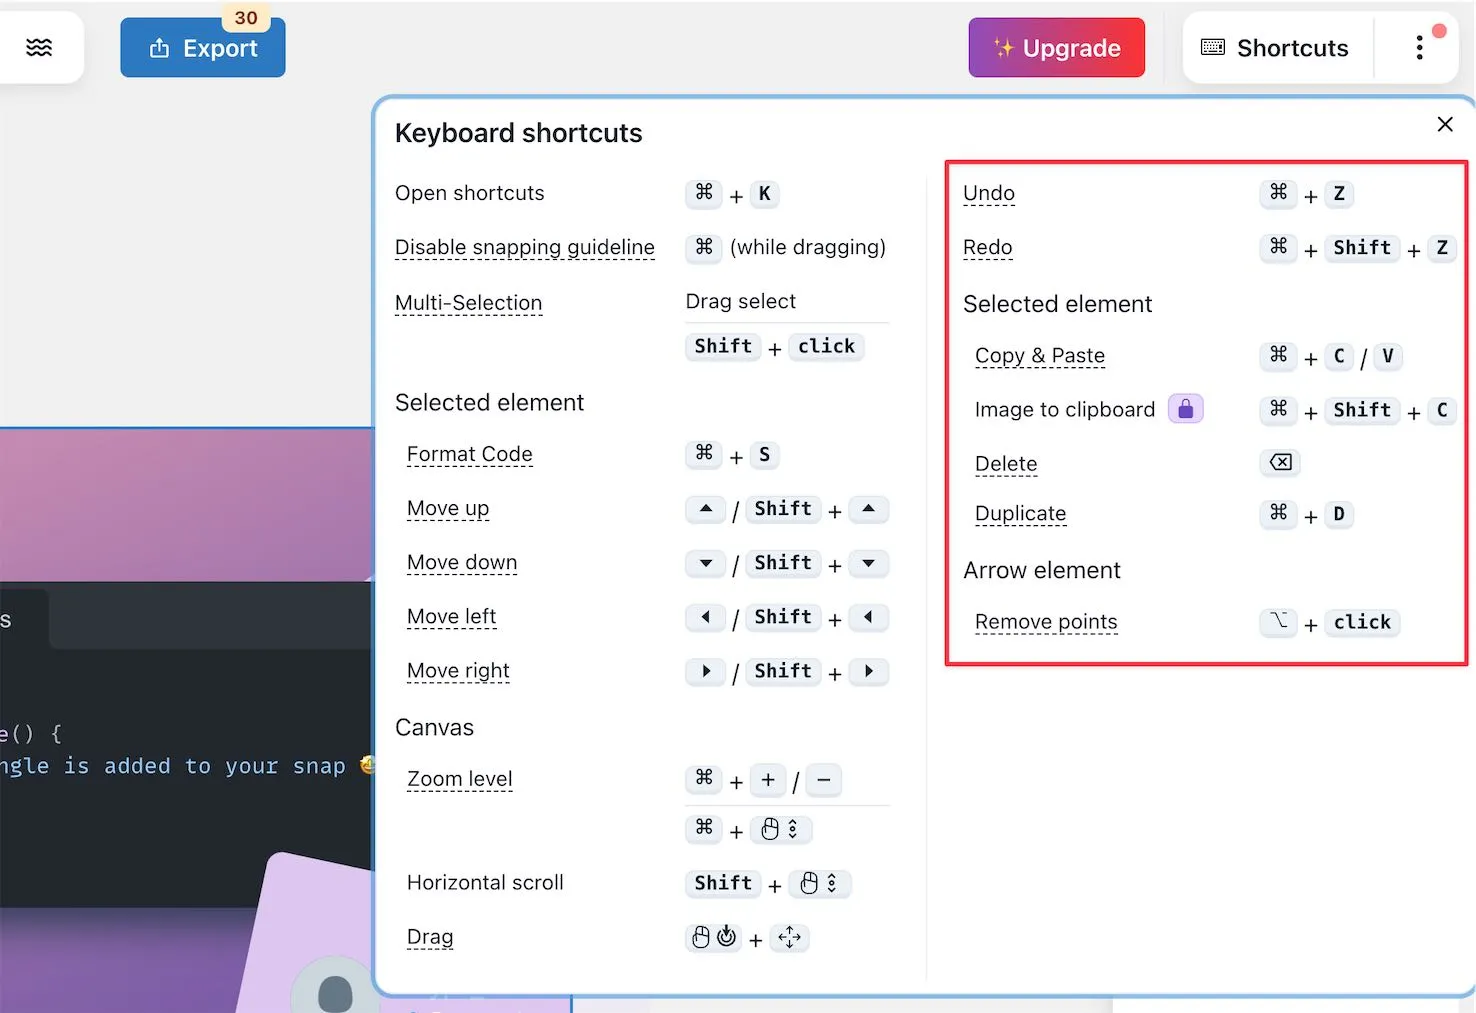
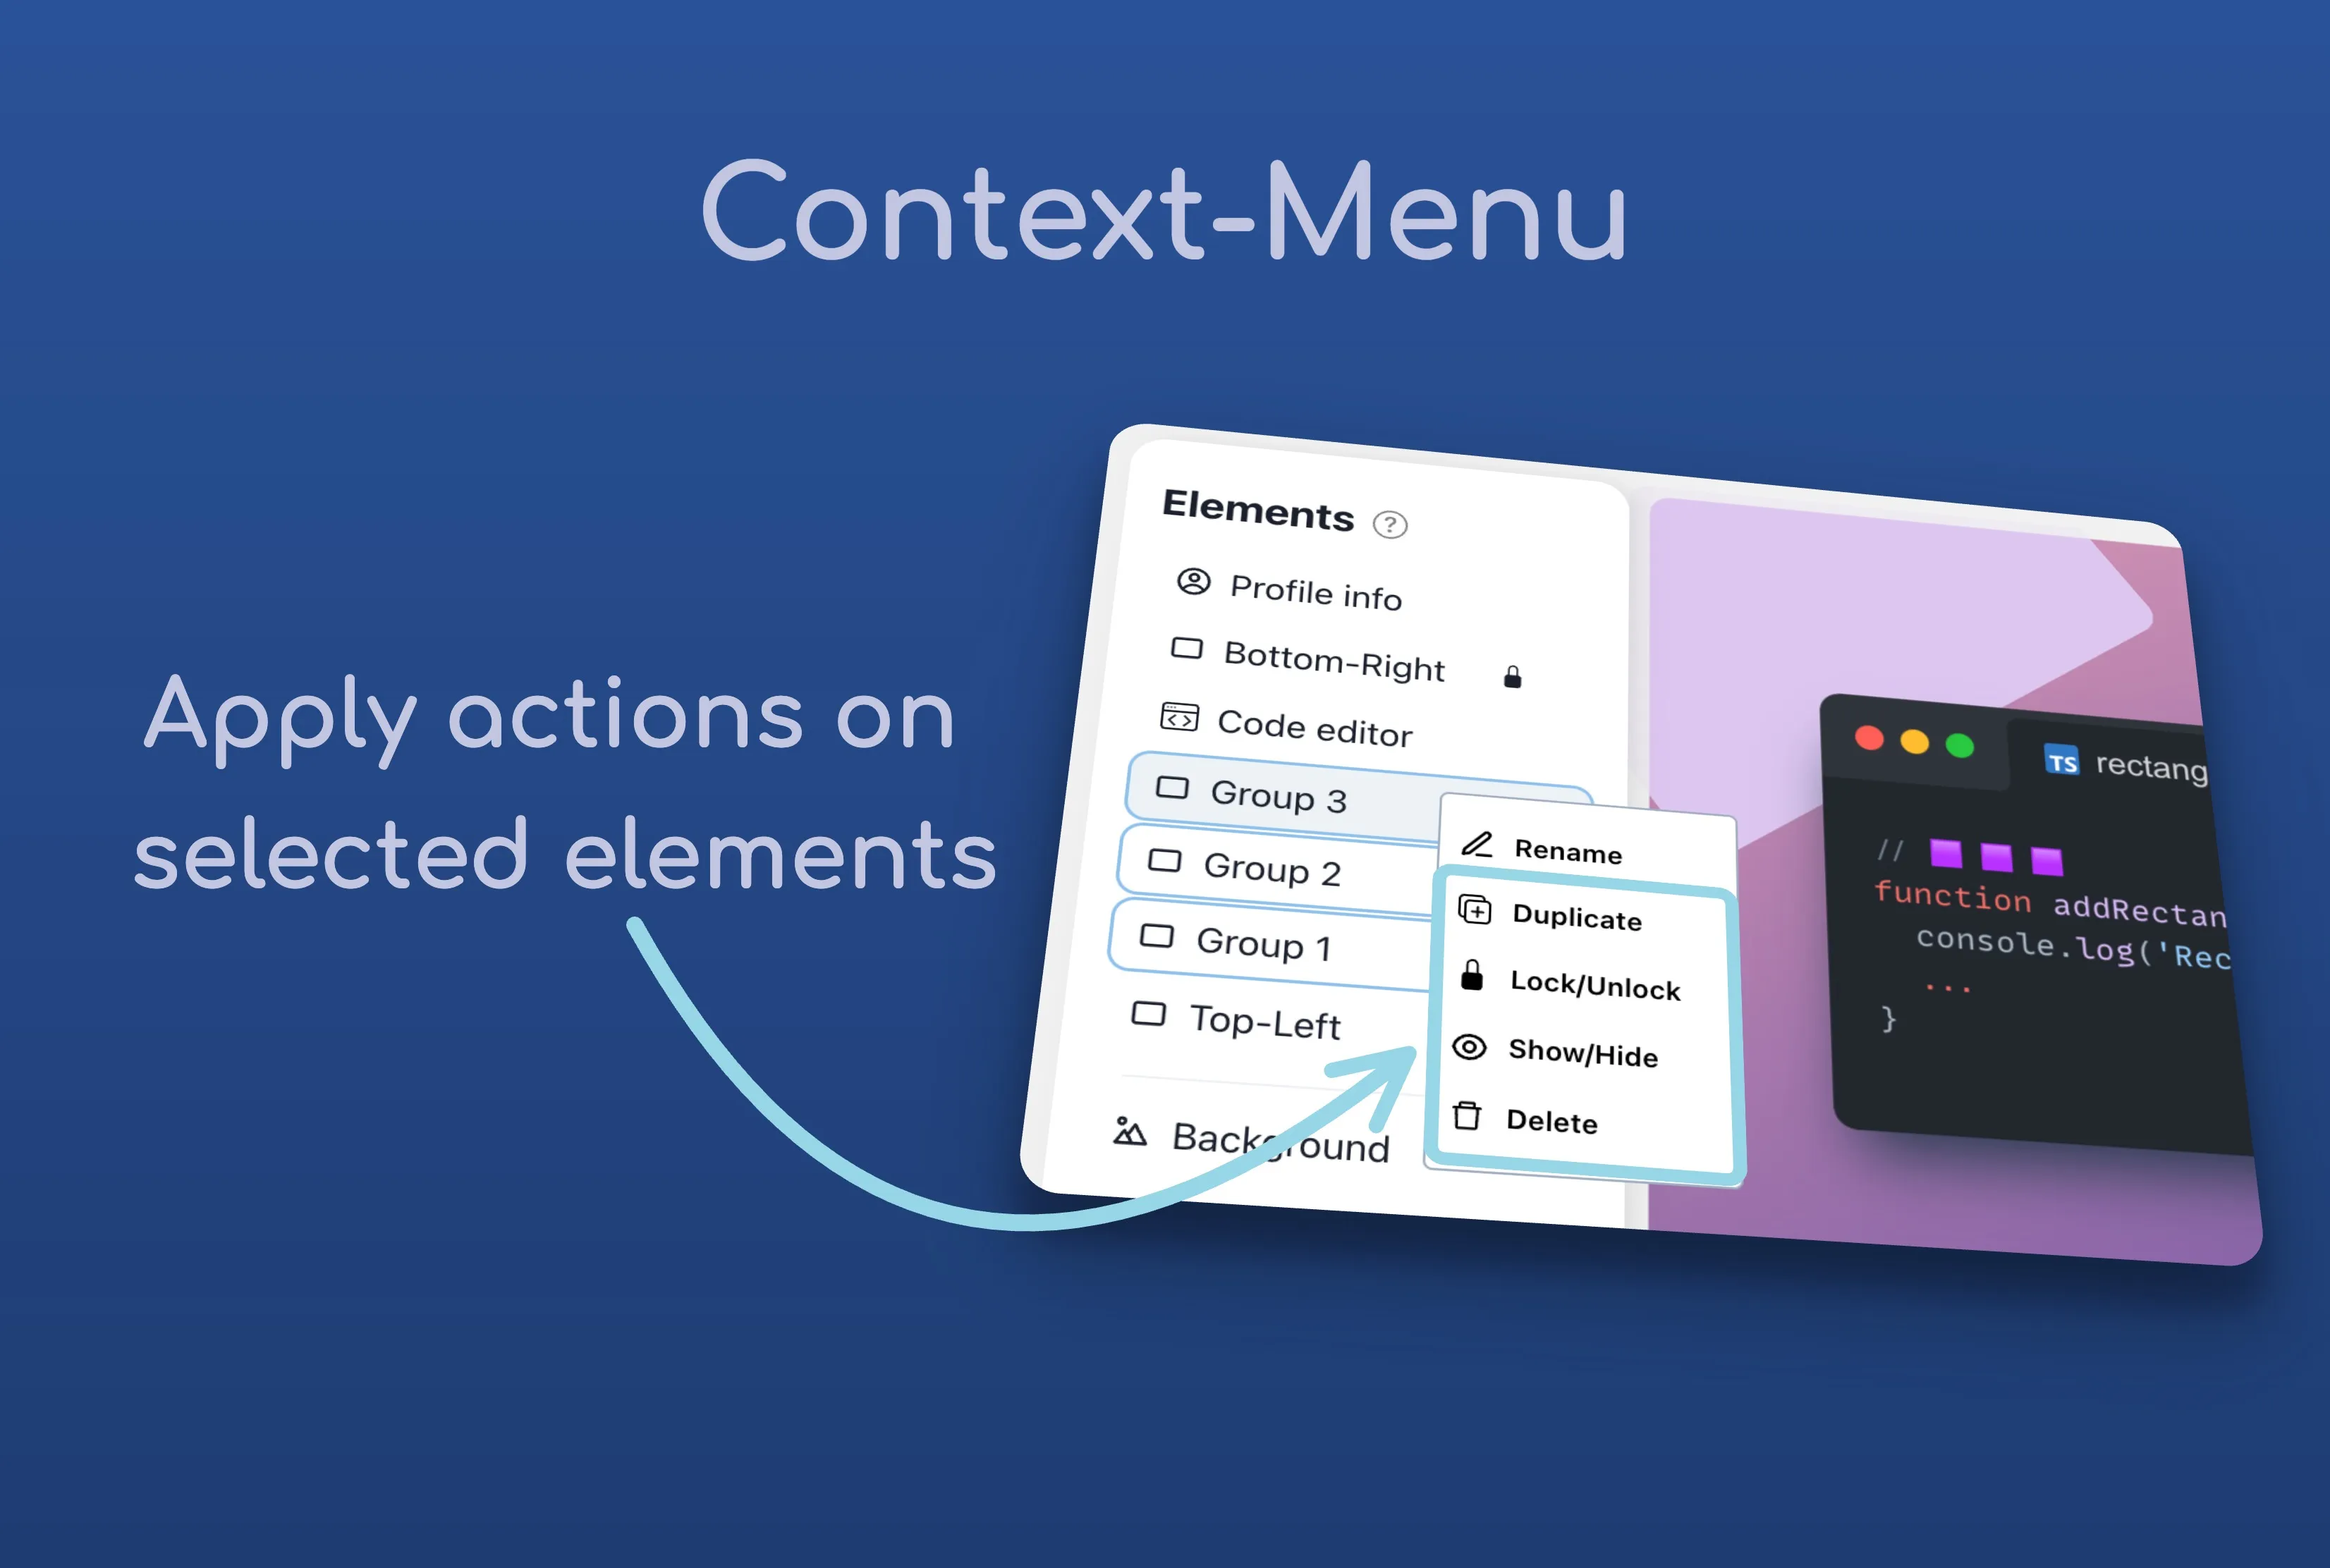
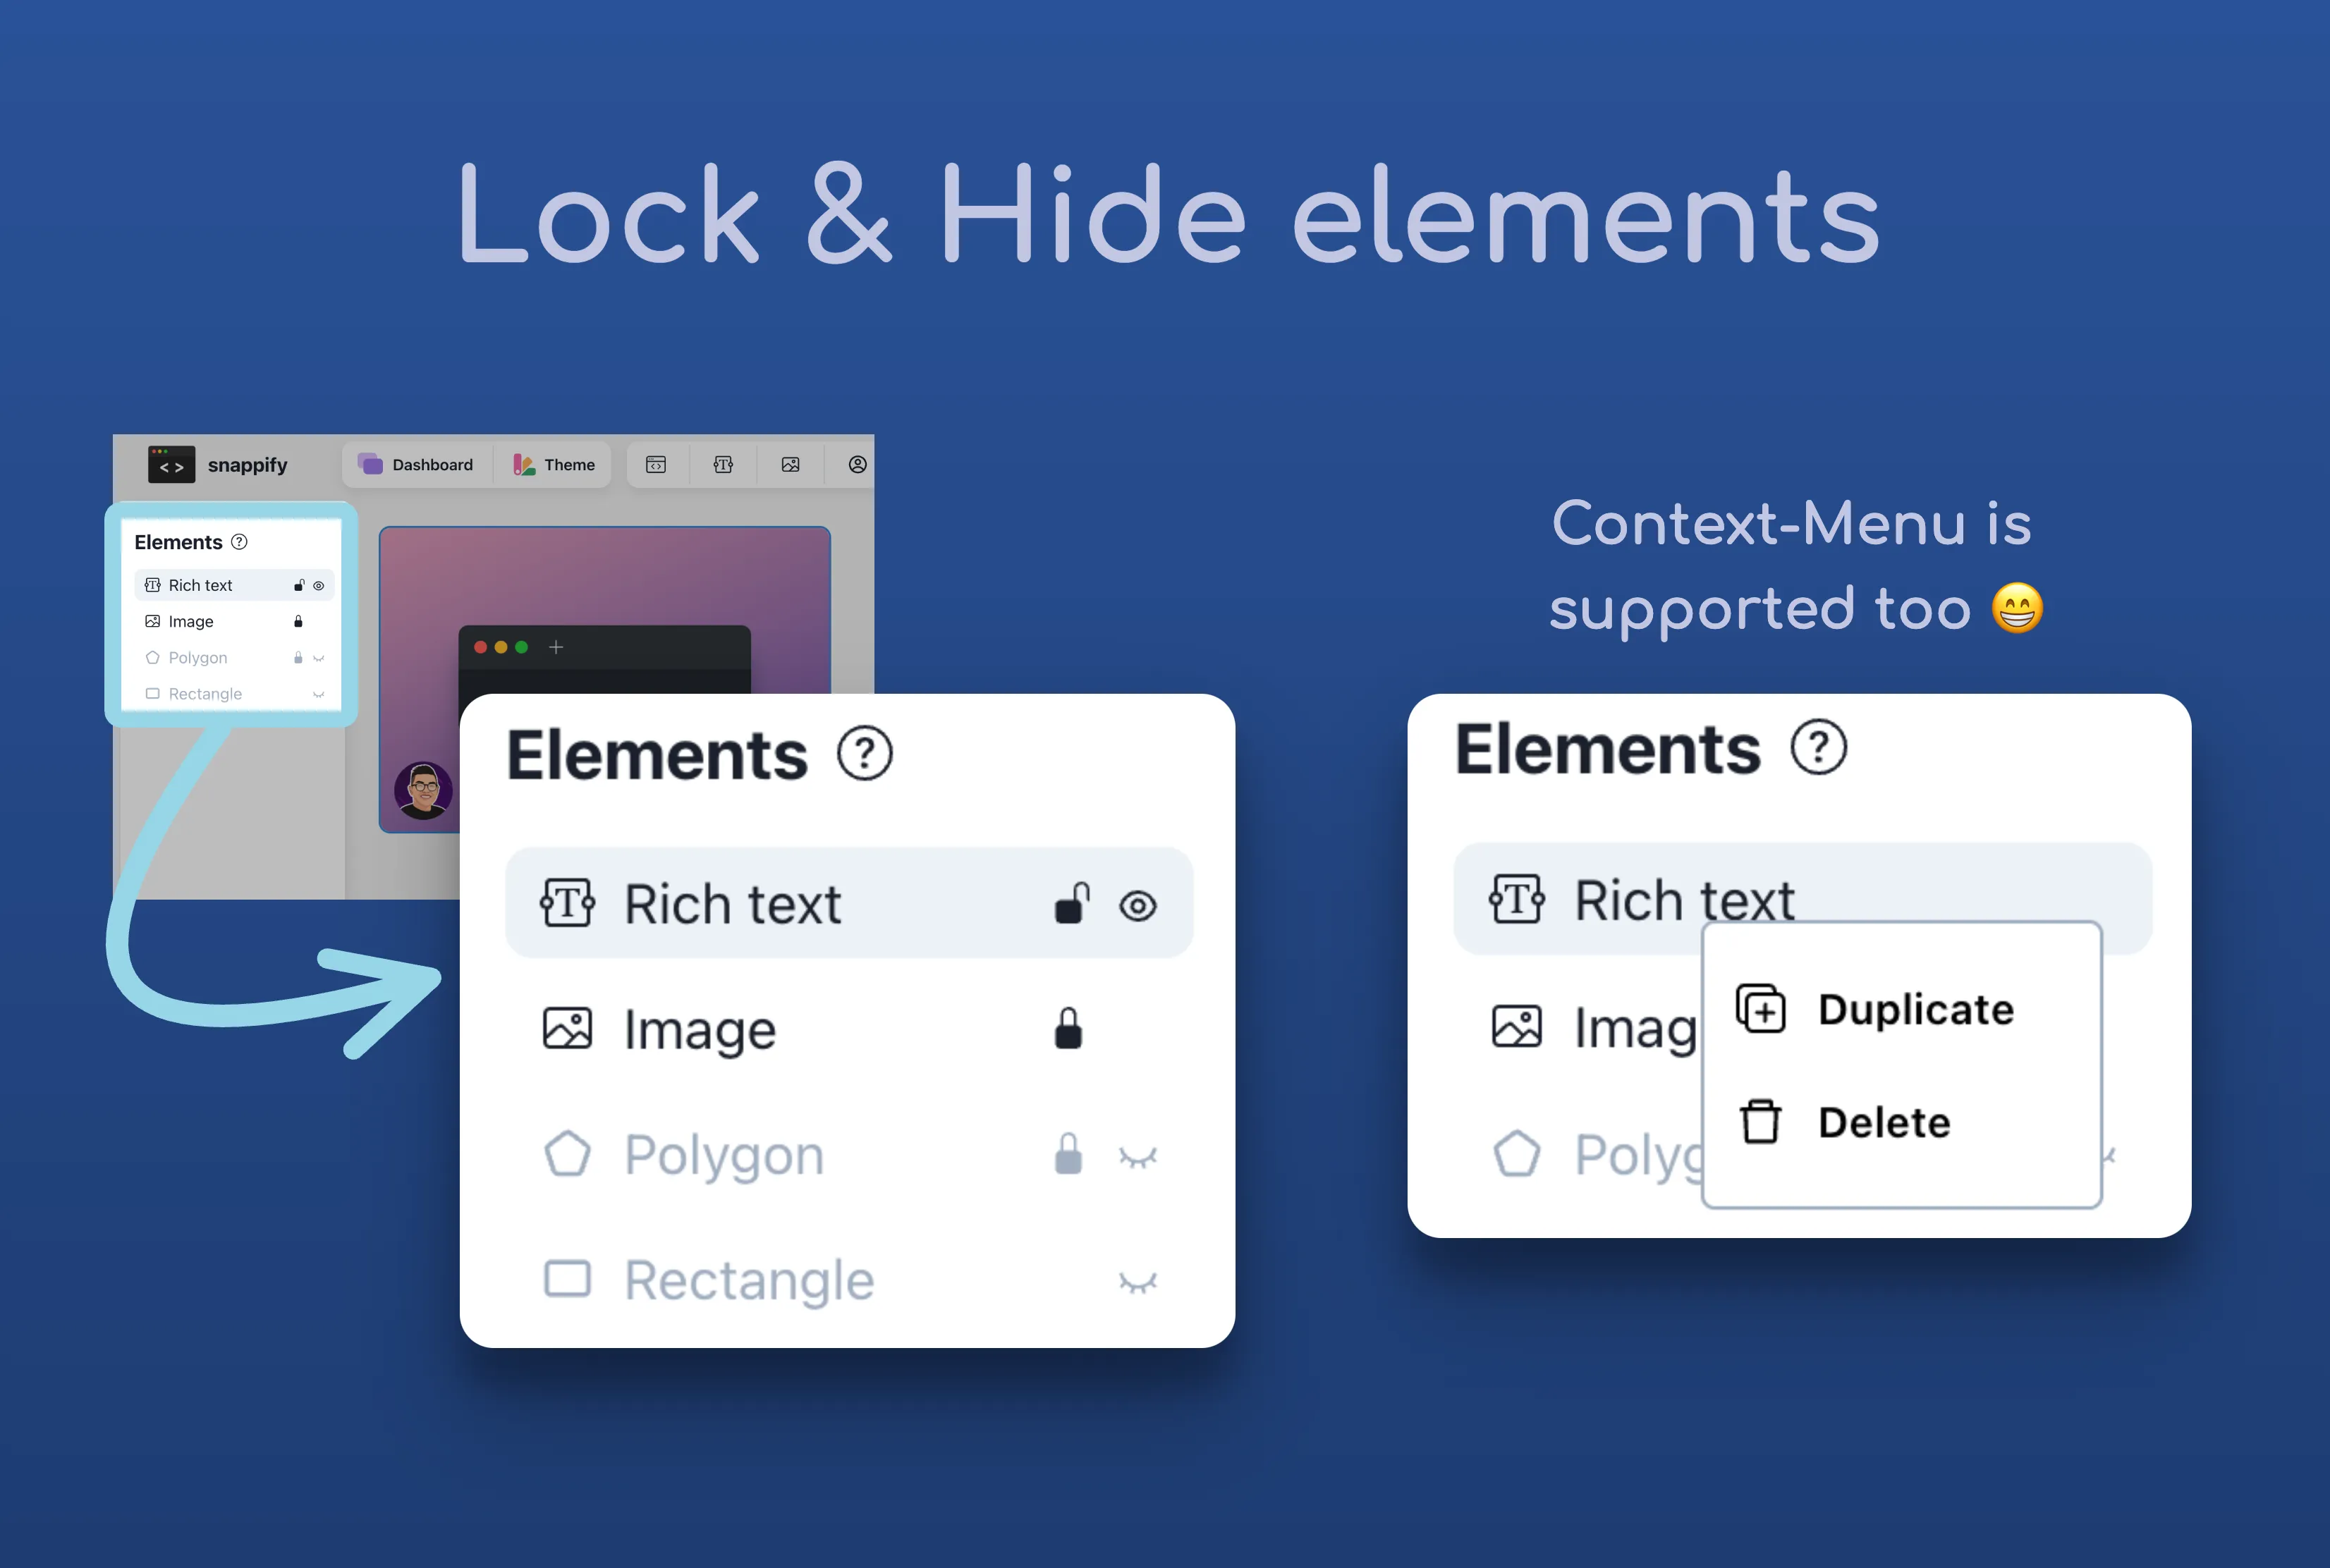
The context menu got new a new option to “Rename” which is the same as double-click on the element. Also, lock/hide options are added, which can be applied on multi-selection.
Give the element a custom name to keep a better overview. Simply double-click on the label of the element to enter the edit mode. The new name will be saved automatically if you click outside or by hitting ENTER.
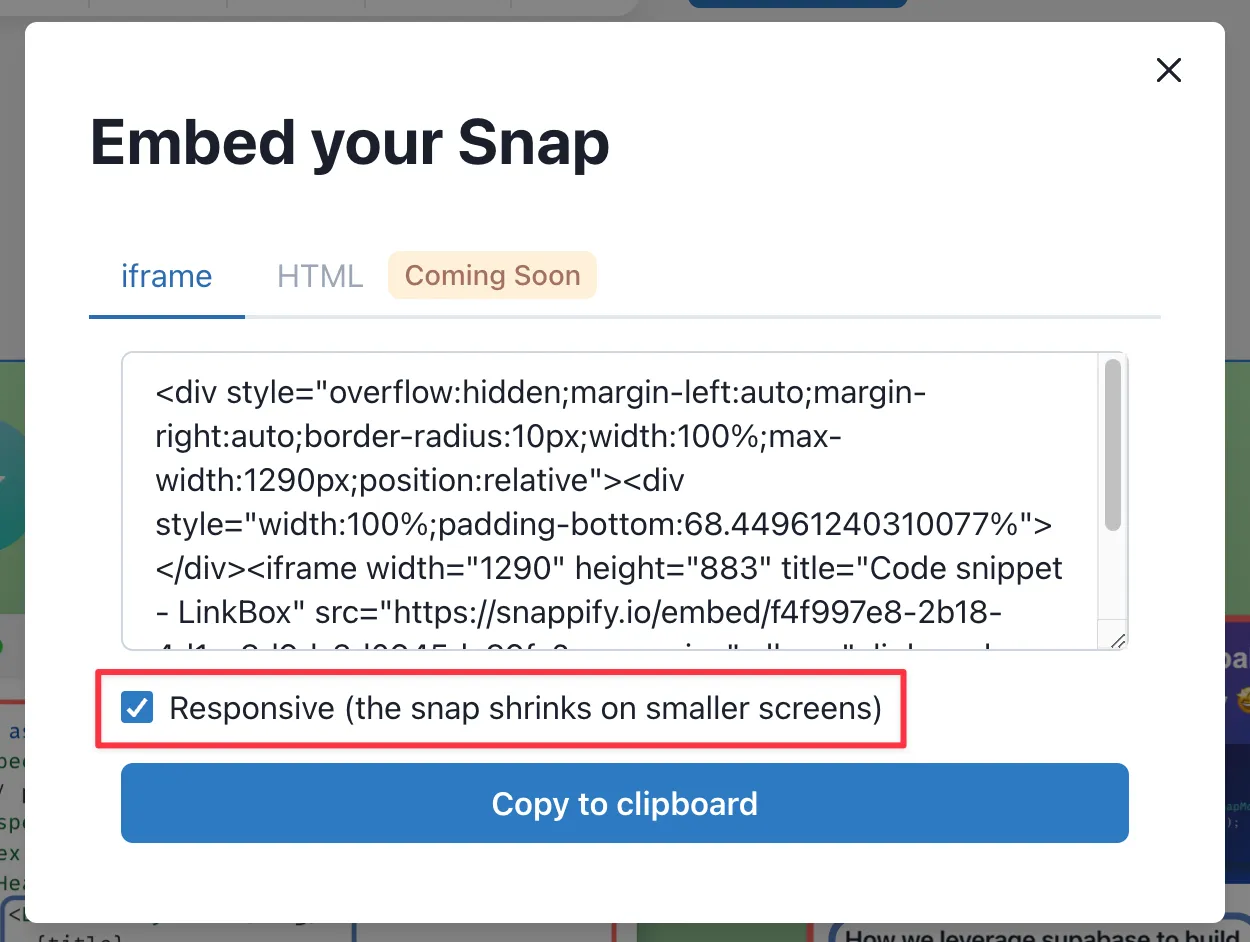
They will shrink in size or be centered depending on the screen size. Now there’s nothing which stops you to embed beautiful code explanations on your own website / blog! 🙌
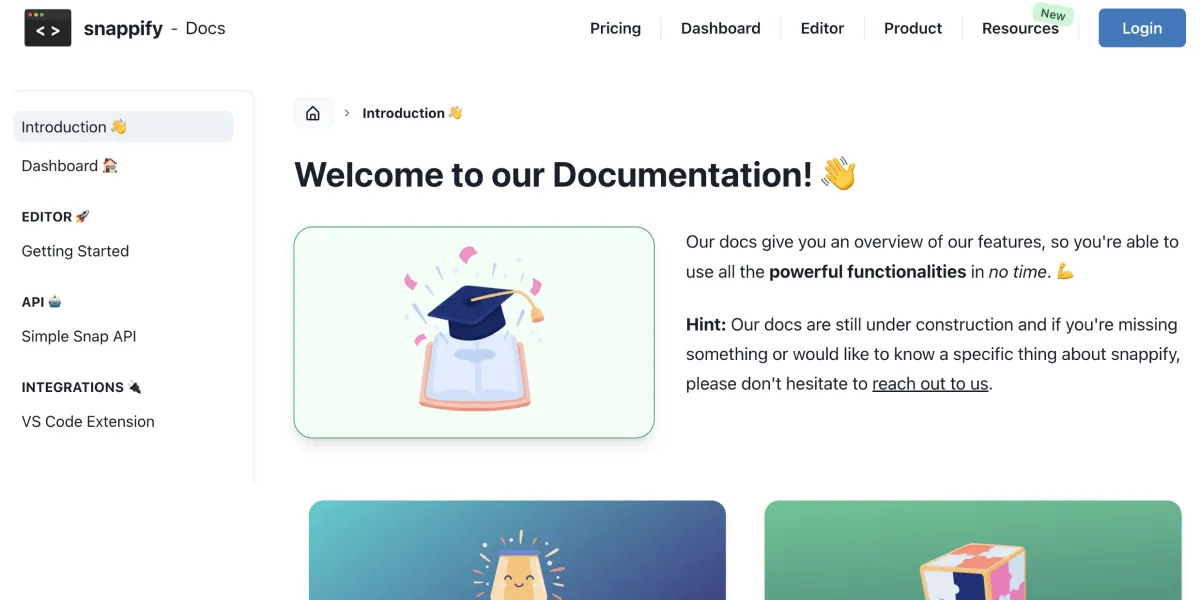
It will be a living documentation and is still not finished, but we’re happy that we have released the first version. If you miss anything specific, please reach out to us via chat.
What’s maybe interesting for you, because it was basically hidden until now, is that we now have docs for our Simple Snap API which lets you automate the creation of your snaps!
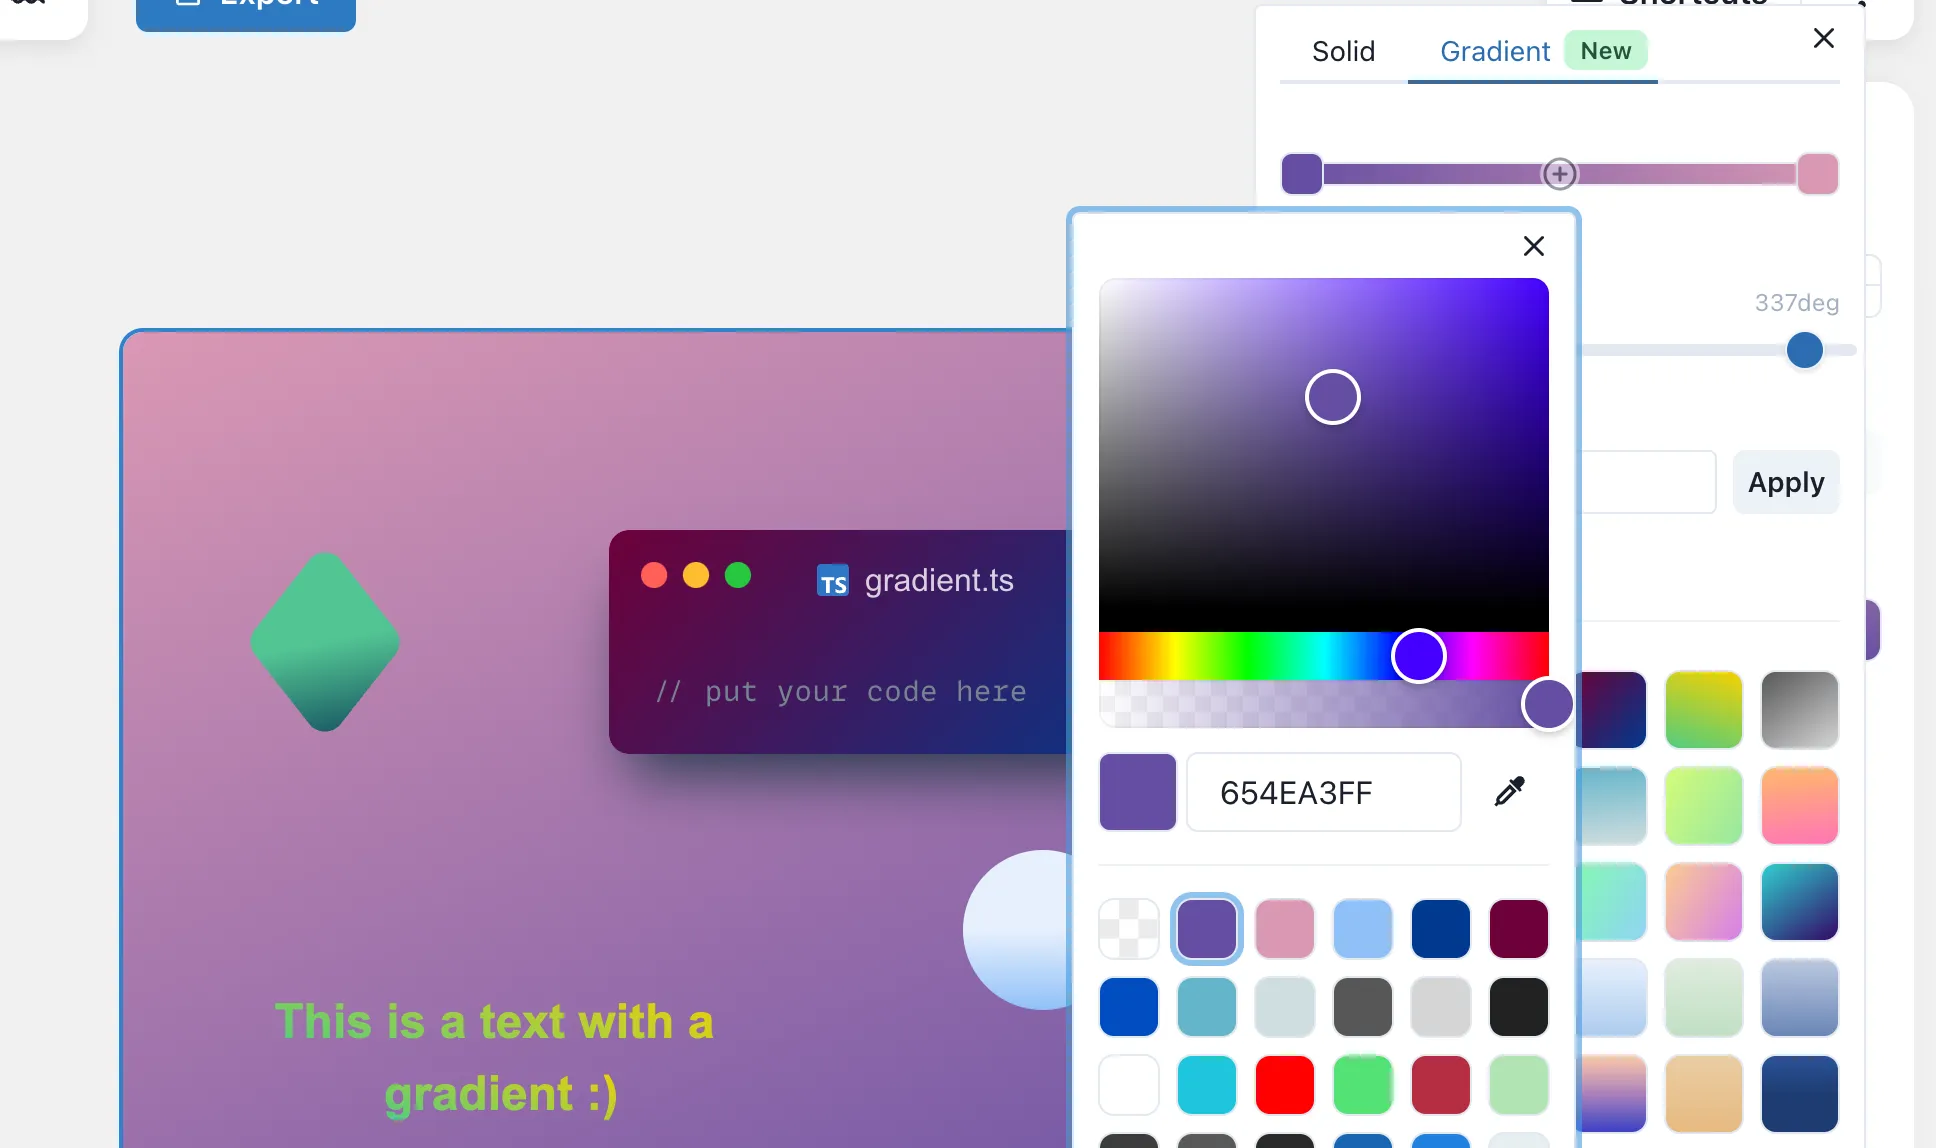
This means that you now can specify gradient colors on every element color, doesn’t matter if it’s the text color, code editor color, stroke colors, snap background - no limitations! 😄
Hint: easily paste CSS gradient values in the gradient picker to apply them!
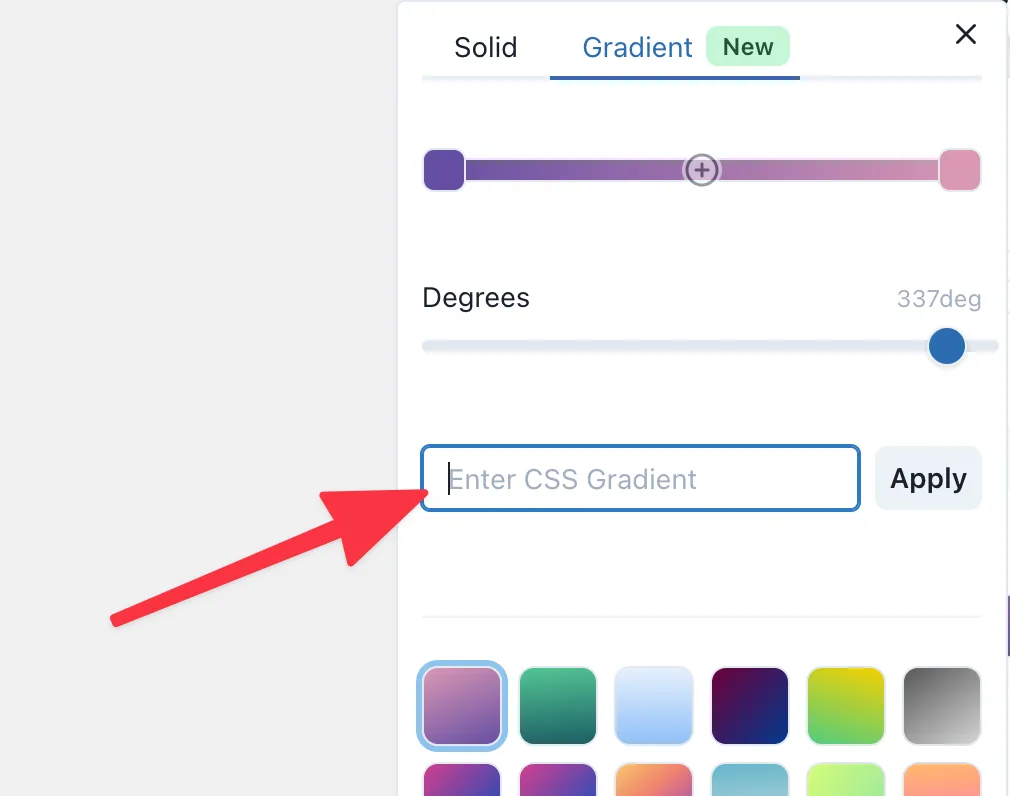
Screenshot showing how to paste CSS gradient values
Promotion Image showcasing the new lock & hide element feature
Lock and Hide elements for a better editing experience on the canvas.
Lock: When an element is locked it becomes not selectable on the canvas so you can’t move it unintentionally.
Hide: When an element is hidden it disappears completely from the canvas. This also means snapping guidelines won’t be applied to this element.
However, in both case, you’ll be able to select the element still on the elements list (left toolbar) and change the properties of the element as usual
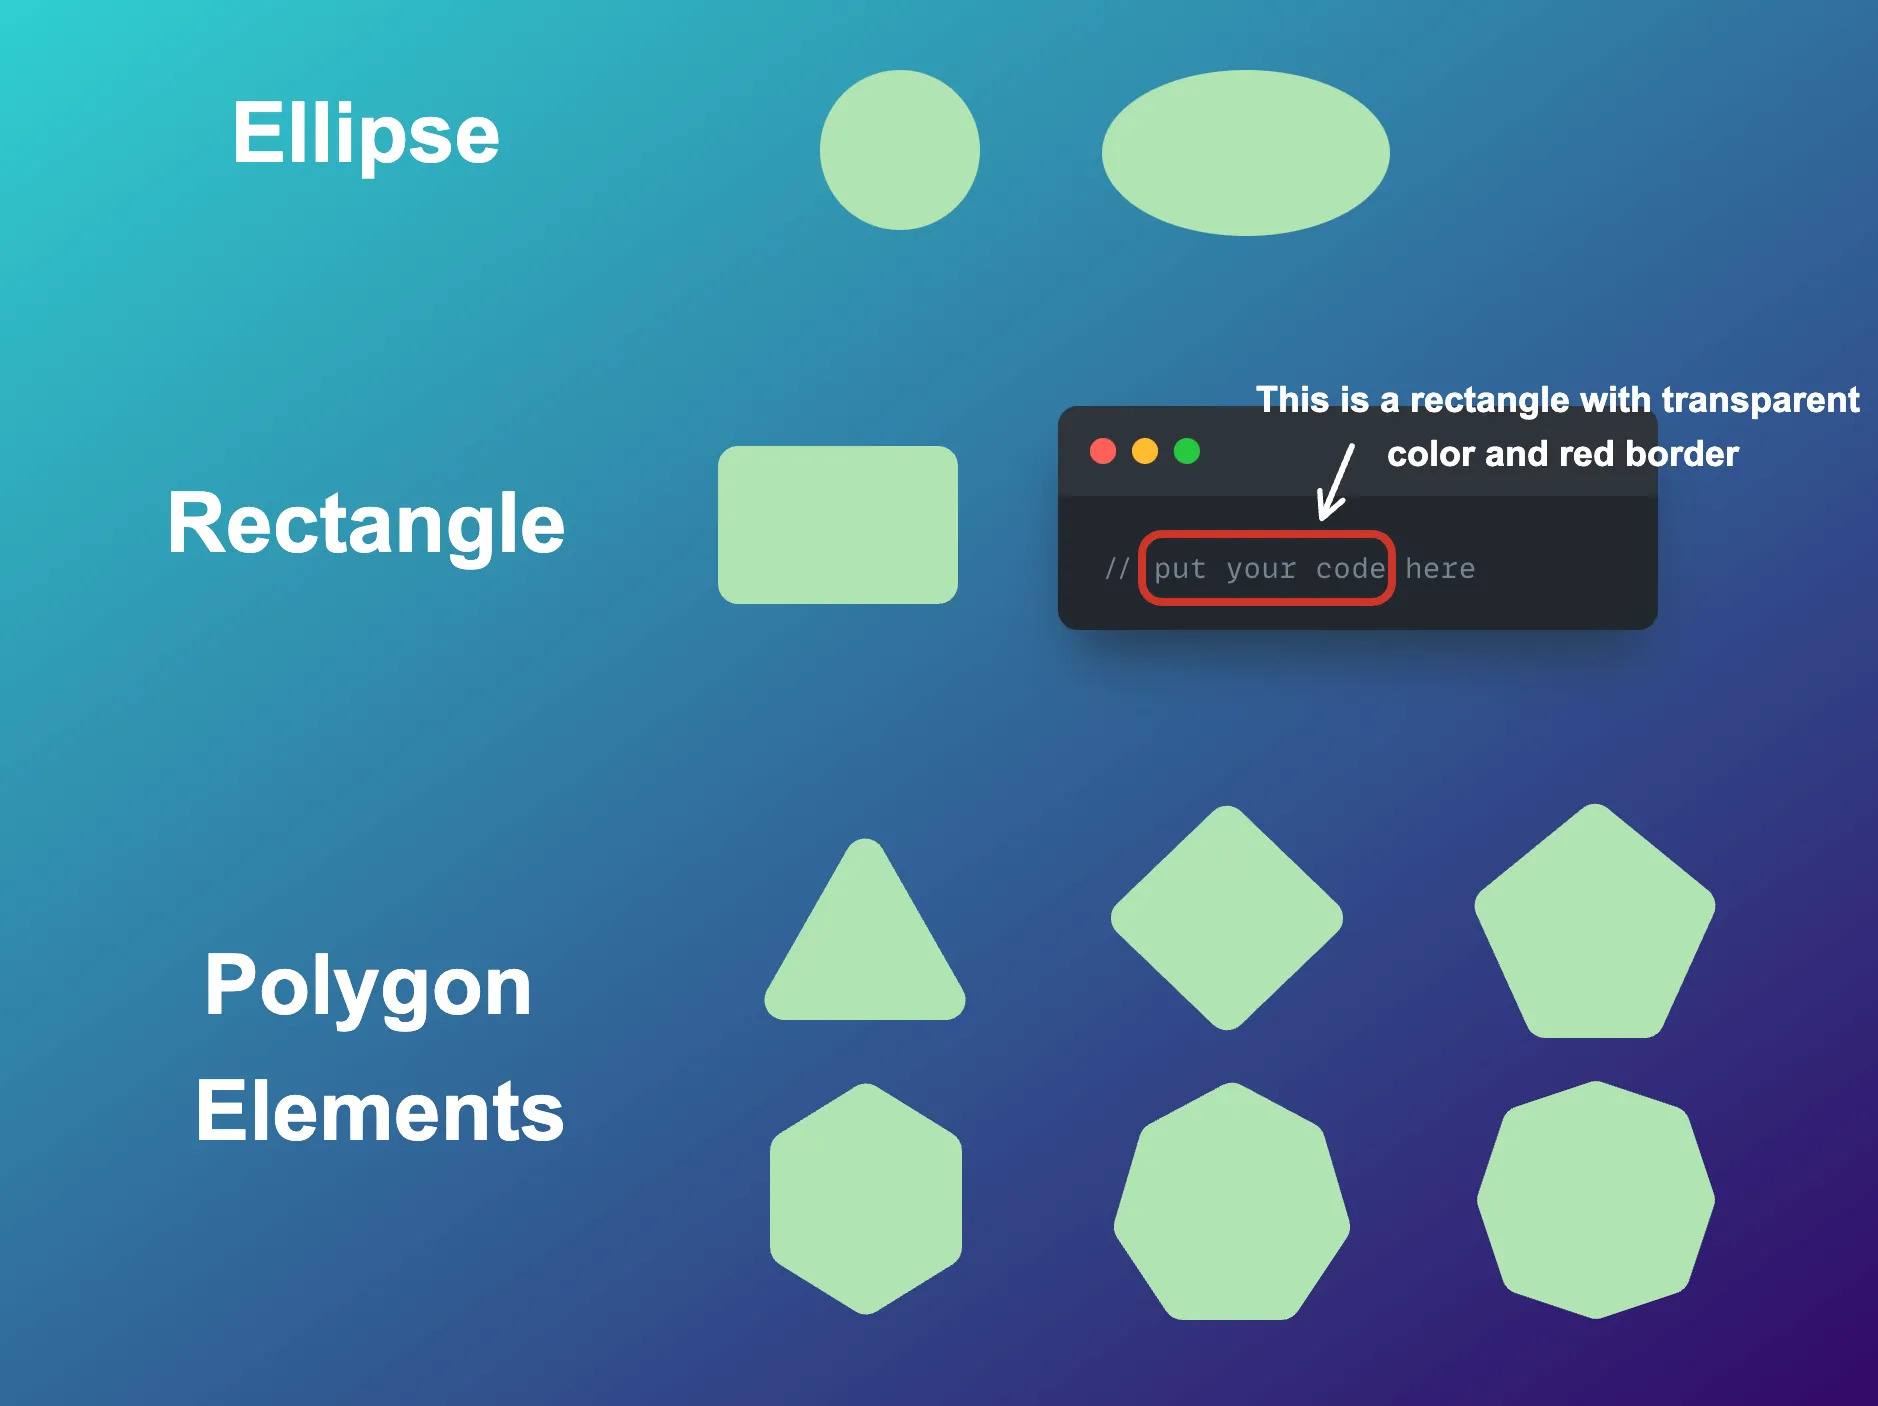
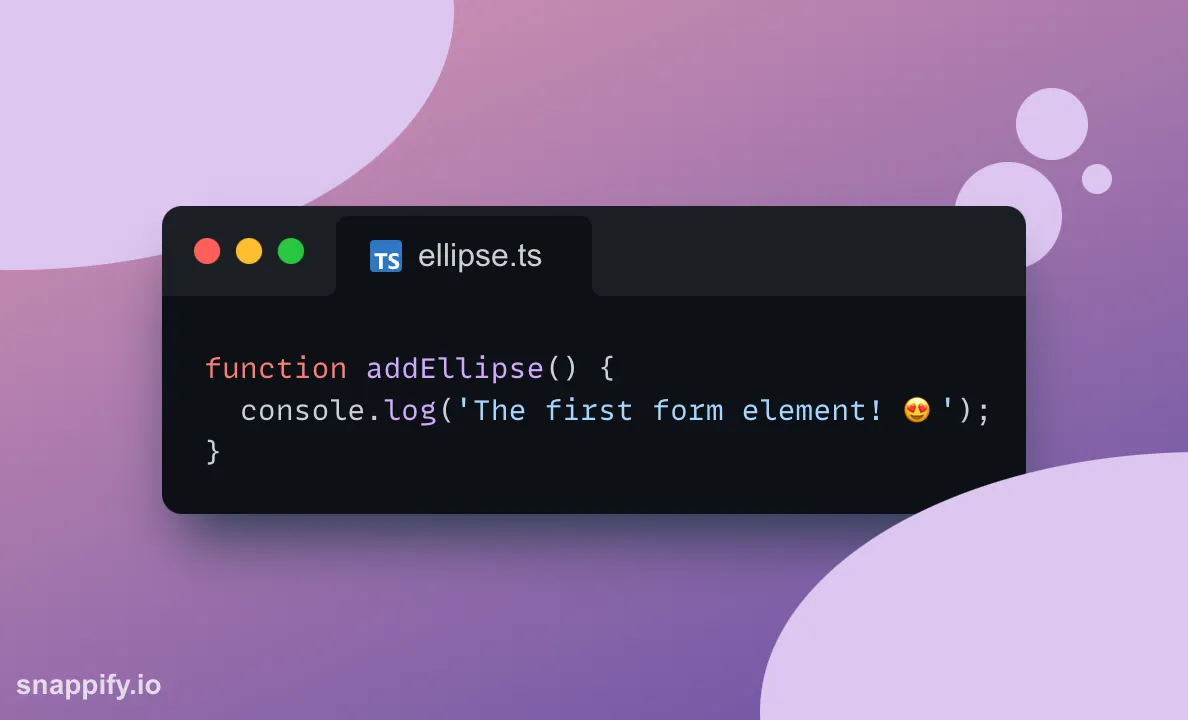
Promotion Image showcasing the new ellipse element
The first form element - the ellipse - hast just landed in snappify 🤩
Form elements help you to style your snaps in an even more unique way and we want to add more variants in the upcoming weeks!
Hint: press Shift while resizing an ellipse element to create circles.
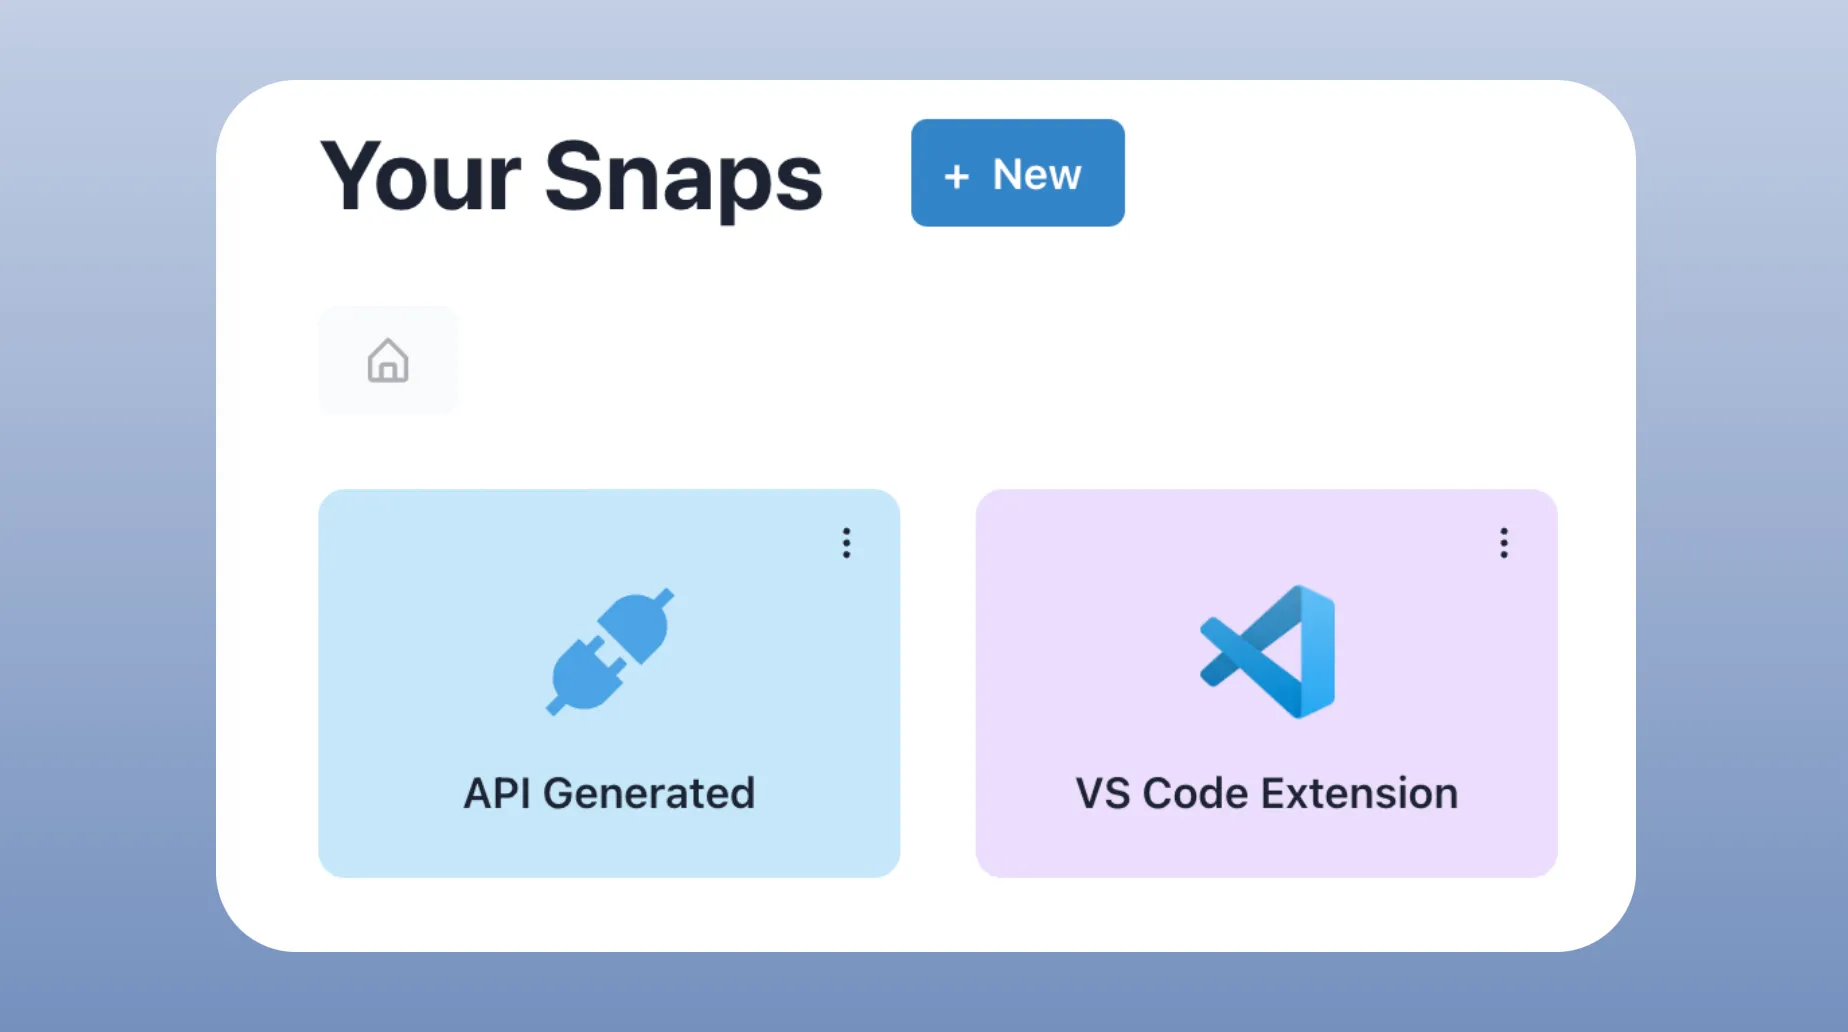
Auto generated folders
Promotion Image showcasing the new automatically generated folders
We introduced “automatically generated folders”.
Every time a snap gets generated via the API or the VS Code Extension, it will be stored in the corresponding folder, so those snaps don’t pollute your Root folder anymore. 😄
Of course you can just move the snaps into any other folder afterwards!
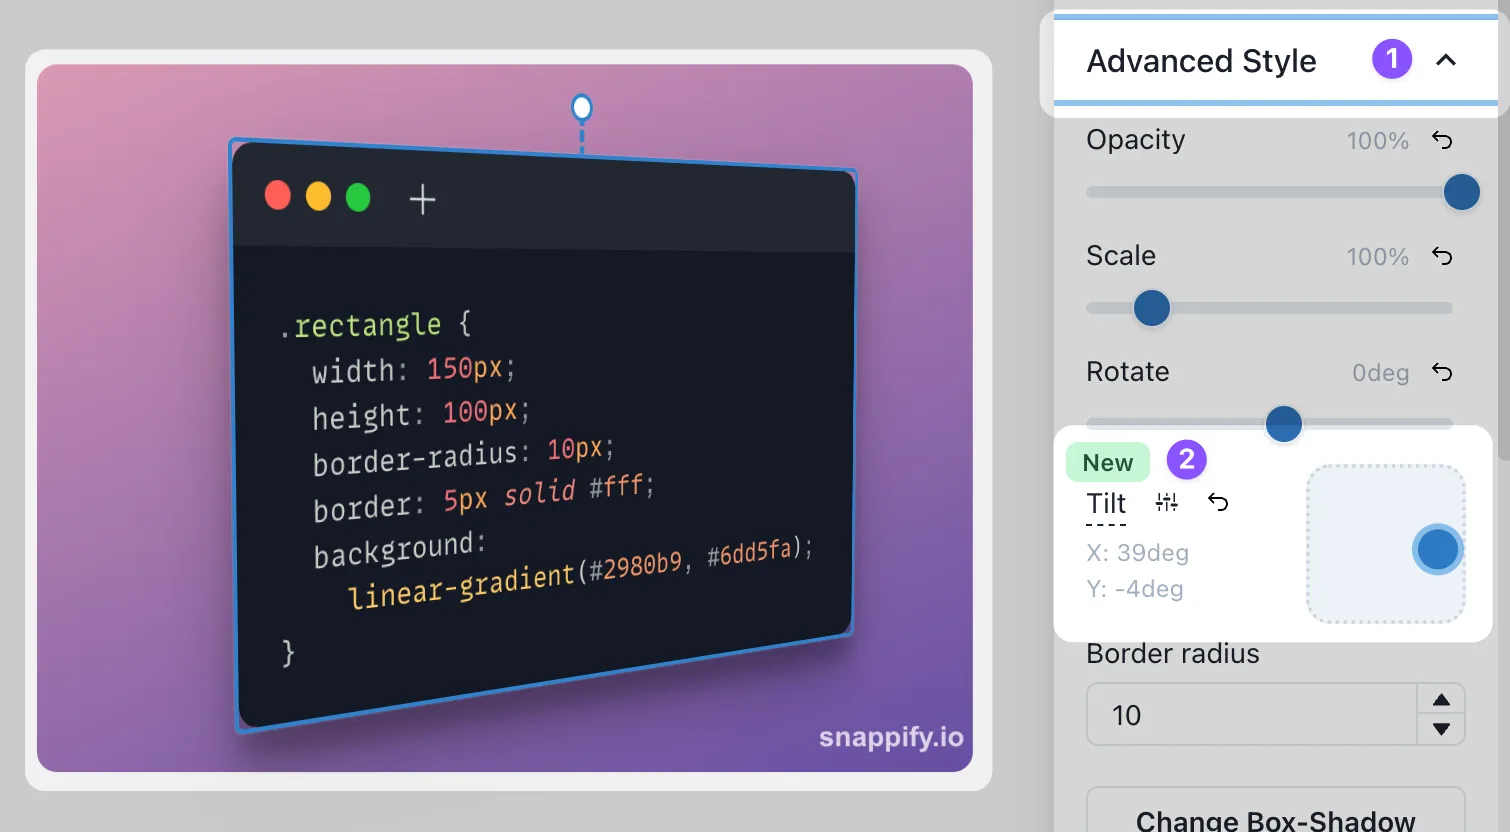
Promotion Image showcasing the new tilting feature
Now you can tilt the code-editor, rich-text, profile-info and custom image elements. So you can present your snap in an even cooler way 😎. Just play with the control (2) - you will love it.
In case you already know the exact tilting degree, you can activate the manual editing mode where you can put the values into the input fields.
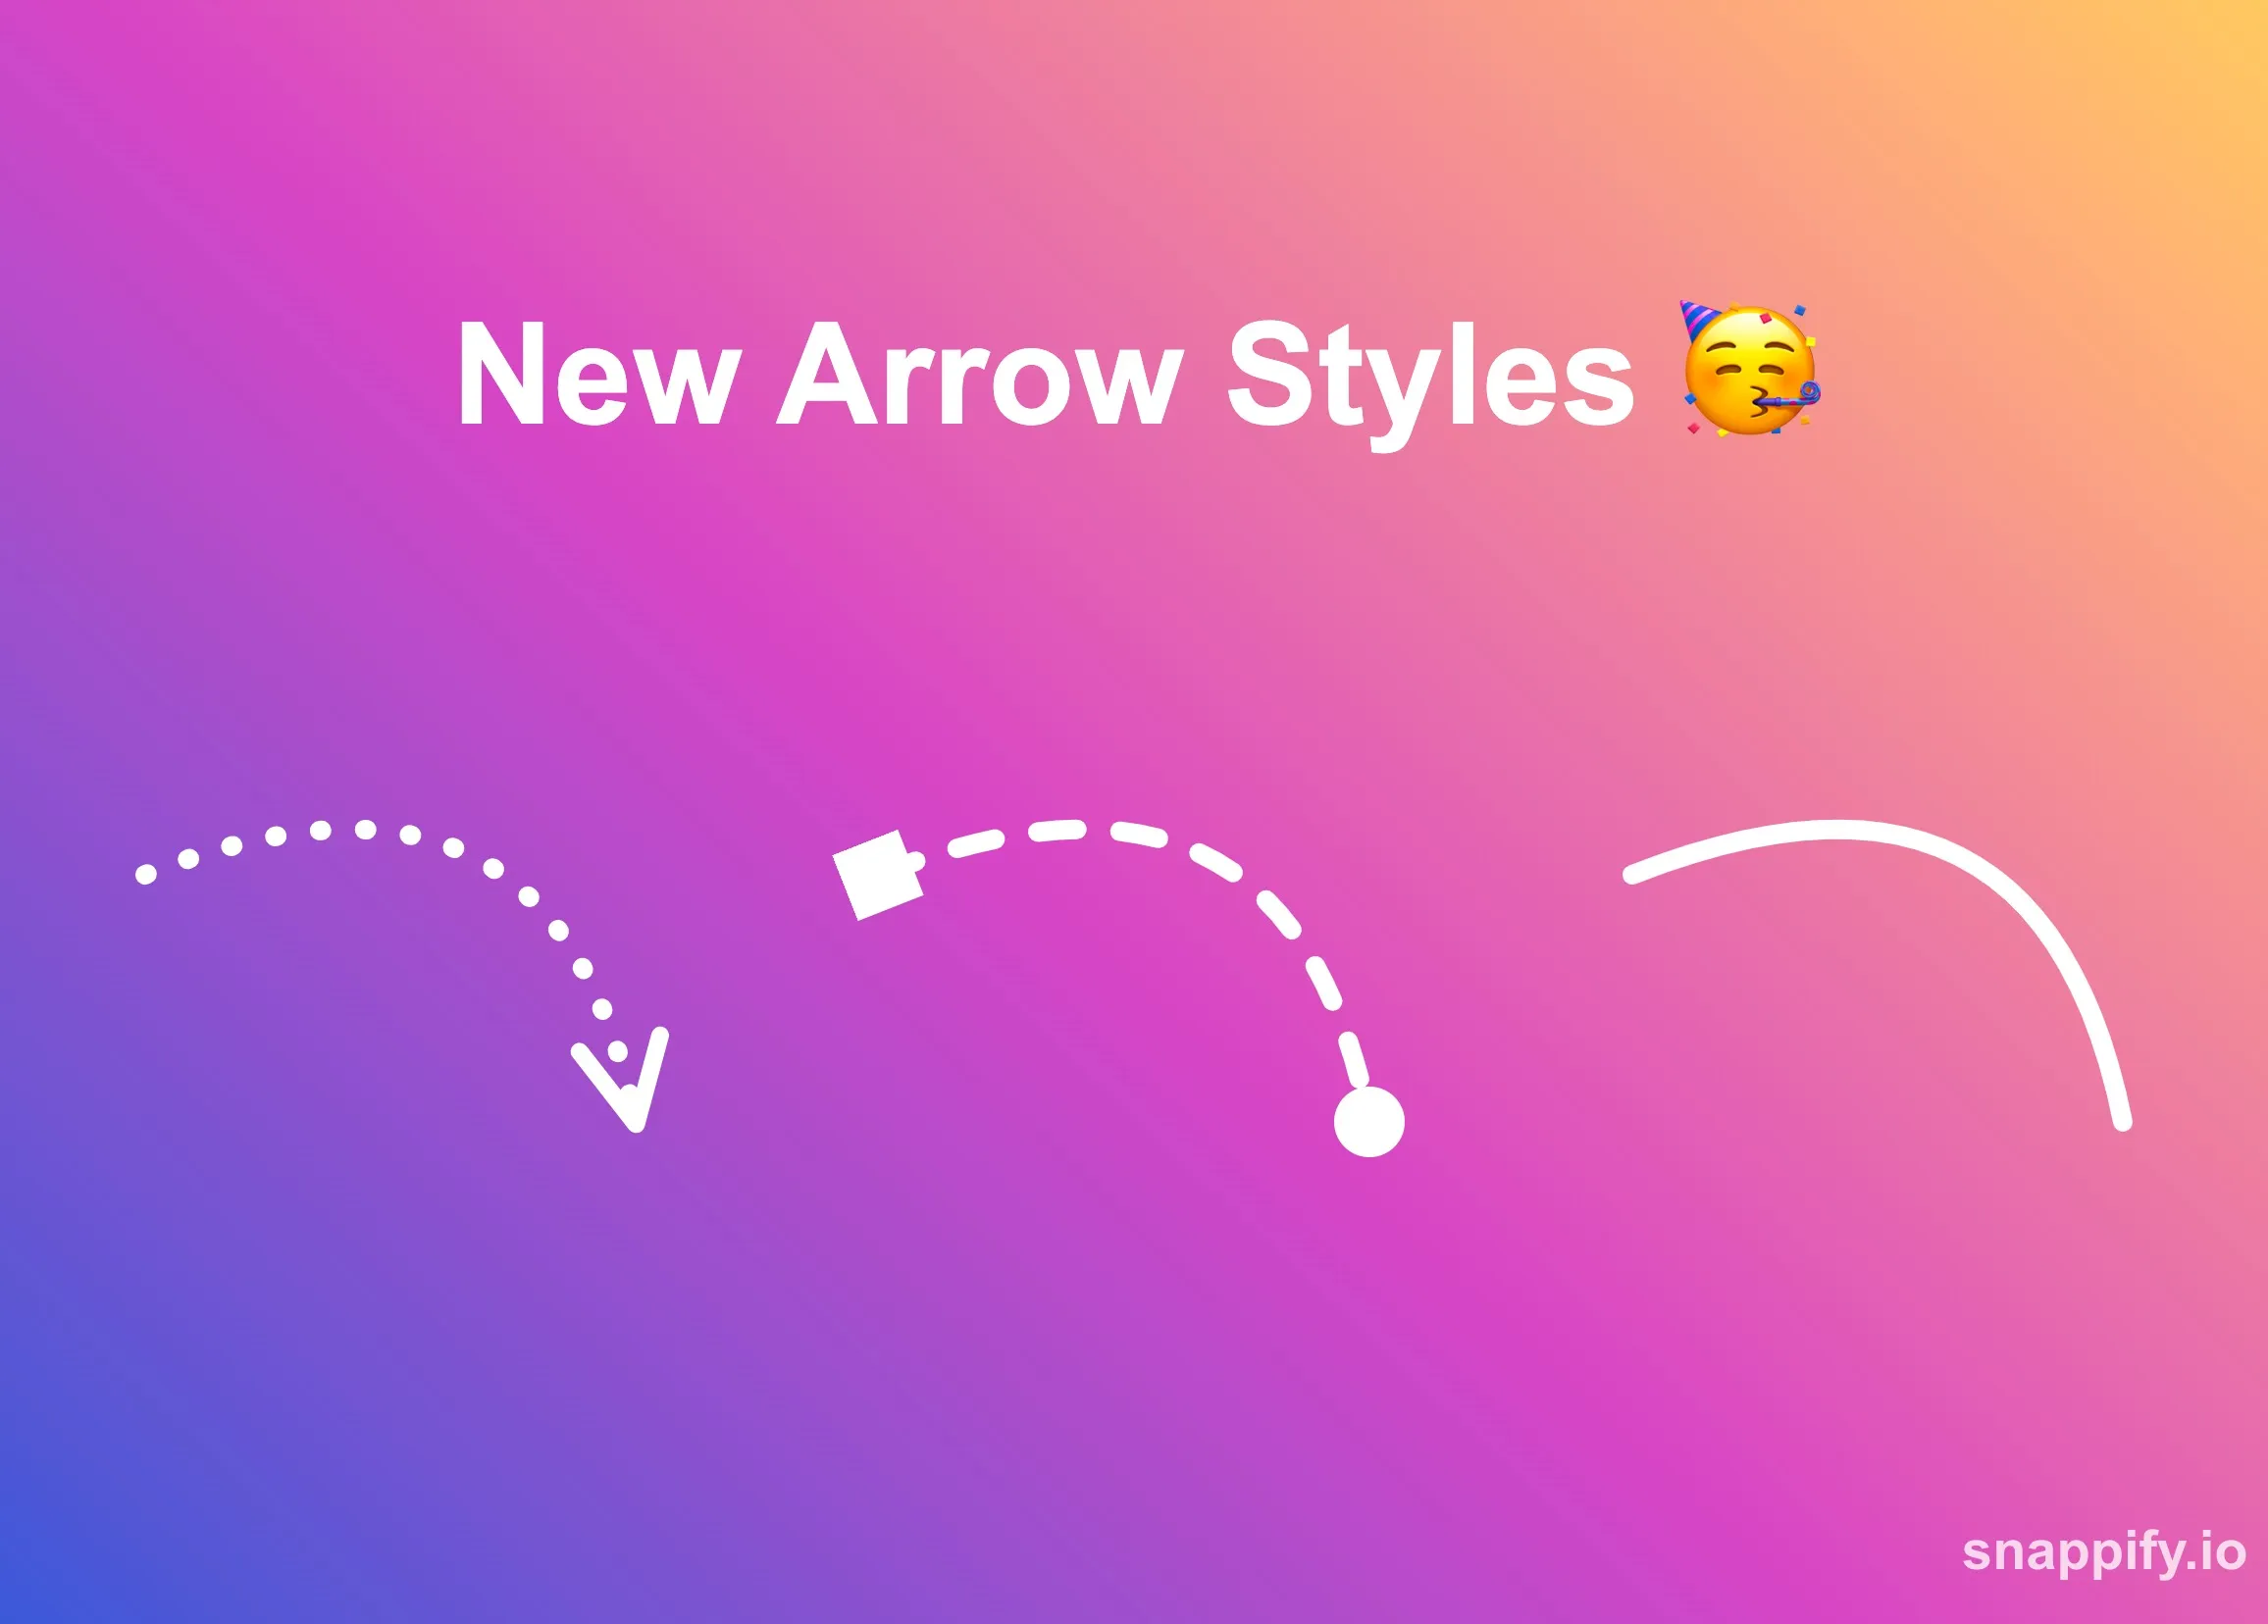
You’re now able to create dashed or dotted lines and have the ability to customize the start and end markers of each arrow. It’s also possible to choose now marker at all to just draw a simple line.
Have a look on the right toolbar when selecting an Arrow element to see which customizations are possible.
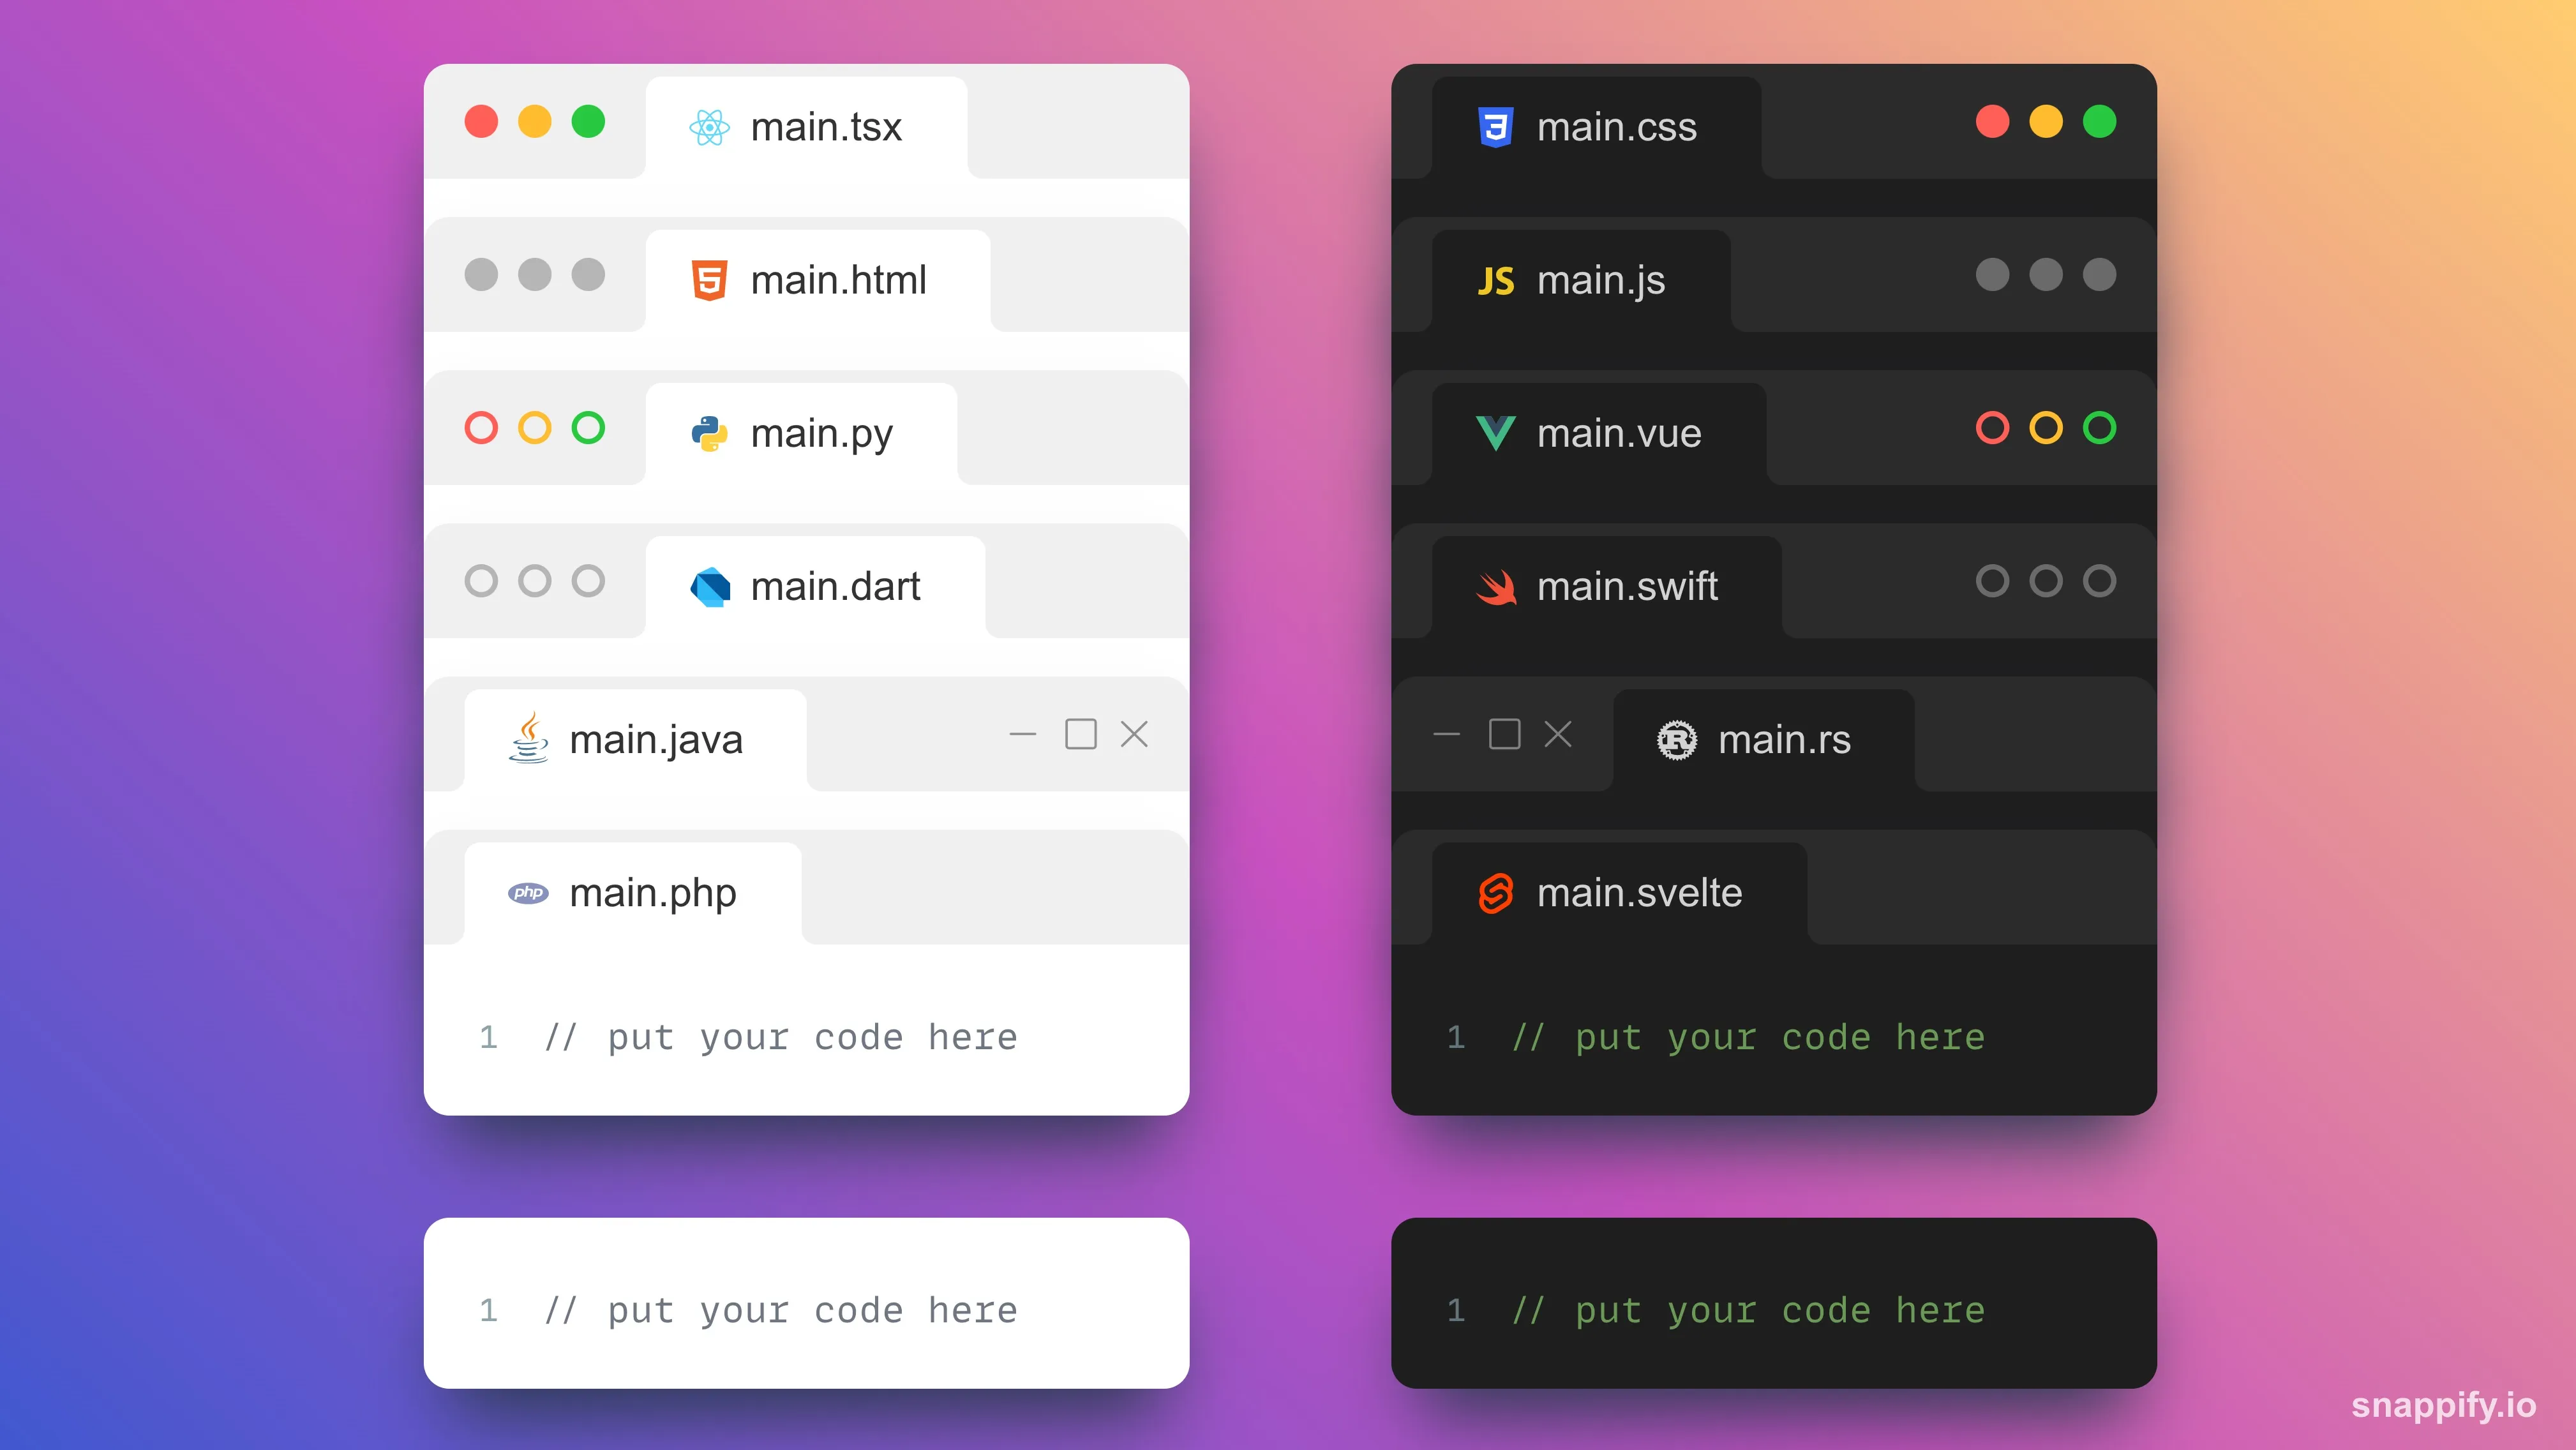
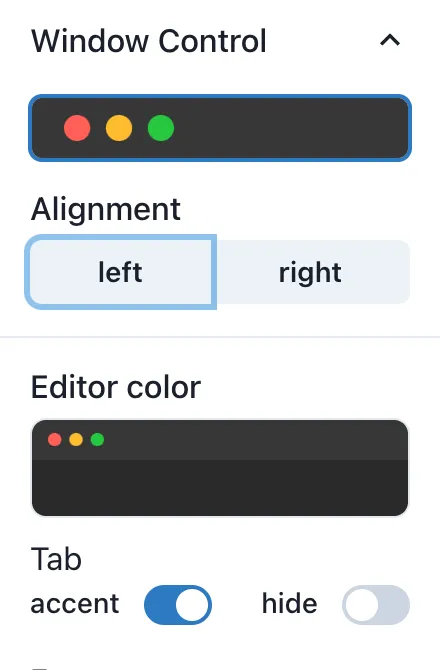
We released some new code window styles to give you more options on how to style your code snippets! 🥳
In order to change the style you have to select a code window and open the “Window Control” accordion on the right toolbar. It’s now also possible to hide the tab completely if you just to want to share a plain code snippet without the window-look.
It’s now possible to upload an image directly from your clipboard. When you have an image in your clipboard and you’re on the snappify Editor, just paste it and it will be uploaded so you can use it right away.
Copy & Paste Elements in the Editor
Another clipboard improvement is that you can now copy & paste the selected elements in the snappify Editor.
Just select the element(s) you want to copy, pess
Ctrl
+ C to copy and then
Ctrl
+ V to paste them again.
This even works across different snaps! So when you have a special group of elements you want to reuse in different snaps, just copy and paste them onto a new snap 🥳
We’ve also prepared a video where you can get a better overview about those new features: