Step-by-step guide to integrate Paddle into your SaaS
In 2021 we started using Gumroad as the Payment Provider for snappify. But as we wanted to implement recurring subscriptions, we started looking for alternatives. We already saw other indie hackers and businesses using Paddle, especially when they’re located in the EU. Paddle acts as a Merchant of Record, takes care of all the taxes and reduces the amount of invoices which is quite the help for small business owners.
Paddle actually has a pretty good documentation on how to get started with their checkout, but I still felt a bit lost when it came to the bigger picture. What do I need to do when a user subscribes? What when a user cancels? How to setup the webhooks and what do I have to persist in our database?
That’s why I want to provide an overview of what has to be done if you want to use Paddle for the recurring payments of your SaaS.
Tech-Stack
Snappify is a Next.js application and we use supabase for authentication and for persisting our data. That means we’ve create a simple REST endpoint with a Next.js api route to listen for Paddle webhook alerts (more on those later).
When Paddle sends us updates we persist the changes into our supabase DB, which is also just a PostgresDB in the end.
Now you have a bit of an overview with which tech-stack we’ve implemented our Paddle integration. But with that said I want to keep the other parts of the tutorial as generic as possible. In the end it boils down to:
- Having an endpoint which listens to changes from Paddle
- A database where you can store the status of the user’s subscription
- User interfaces where the user can manage his subscription based on his current status
Configuration in the Paddle Dashboard
The Paddle Dashboard is the place where we do all the configurations of our integration. We create subscription plans, configure the related prices and also have some branding options for our checkout process.
It’s also good to mention that there’s a Paddle Sandbox Environment and it’s definitely recommended to do all your testing there so you don’t have to deal with real payments. It’s also good to get yourself familiar with the Dashboard there before you make some mistakes on the production environment.
Now let’s go through all the configurations we should make in the Dashboard upfront.
Create your Subscription Plans
Depending on how many different subscriptions plans you offer for your SaaS you also have to create corresponding plans in the Paddle Dashboard. It’s where you define the pricing and other details. In fact you even have to create two plans for each plan if you want to support monthly and yearly subscriptions. So for our example, we create two plans, a yearly and a monthly plan.
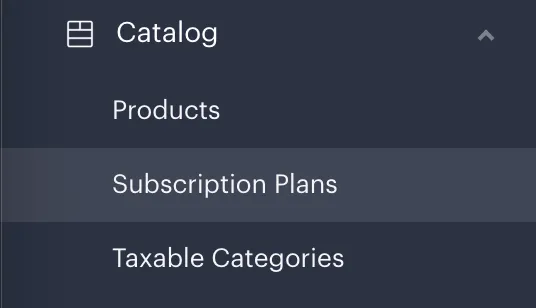
Open the “Catalog” Accordion in the left menu and go to “Subscriptions Plans”. Click on the “New Plan” button on the top right. Go through the creation step by step and ensure that all the details you filled out are correct (choose the correct currency, price, billing interval, and so on). The ids which are generated for those subscription plans will be needed later when we integrate Paddle into our app.
As Taxable Category you should choose “SaaS”. The first time you do this you need to get the taxable category verified by the Paddle team. This could take some time so make sure to do it as early as possible in the production environment.
Adjust the Checkout Settings

Now let’s move on to the “Checkout” accordion and click on the “Checkout Settings” item. Here you can specify the Payment methods which should be available for your customers and adjust the branding color of the Paddle Overlay Checkout. You also have access to other settings as emails and a statement description for the invoices. Definitely have a look at the “Sales Tax Settings” menu item on the left side and decide which setting is the best fit for you and your customers.
Next let’s make sure that our domain(s) get approved by navigating to the “Request Domain Approval” menu item. Add all the domains where you want to integrate Paddle so that they will be approved.
For now we are done with the configurations which need to be done upfront. Let’s move on with integrating the checkout overlay.
Integrate the Paddle Checkout on the frontend
The first time your user is probably going to interact with parts of the Paddle integration is on your pricing dialog. In most cases you have one or many pricing plans for your product available. Once he clicks on the Upgrade button for one of those plans you want to initiate the payment process.
With that said it should be a requirement, that the user is already logged in. So when he clicks on one of those buttons, but isn’t logged in yet, we redirect him to the login page instead.
Add the Paddle Script Tag
To make the Paddle Checkout work on your website, you have to add the Paddle script. Here you can see how our PaddleScript component looks:
As you can see we’re leveraging the Next.js Script component here, which we only include on pages where the user interacts with Paddle specific functionality.
You also can see that we have two environment variables here:
NEXT_PUBLIC_PADDLE_SANDBOX- which takes care of activating the Paddle Sandbox Environment locally and in our dev environments. It’s a Test Environment from Paddle which you can and should use for locally testing the payment integrationNEXT_PUBLIC_PADDLE_VENDOR_ID- which passes our unique vendor id (can be found on the Paddle Dashboard) so that Paddle knows who we actually are. This also differs for the Sandbox Environment as you get a different vendor id there
With the above script included on your website, you’re ready to call the Paddle functionality via the global window.Paddle object.
Getting started with the Paddle Checkout
There are two ways you can implement the checkout process with Paddle:
- Overlay Checkout: the Checkout experience opens up as a separate modal, there are some branding options to adjust the color of the modal to the branding of your app
- Inline Checkout: here the Checkout is integrated as an iframe into your existing UI, there are even more branding options to adjust the look-and-feel of the Checkout experience to your app and make it more seamlessly integrated for the user
Maybe there’s even a ways to do a complete custom checkout process, but I didn’t dig deeper into this, because we also wanted to keep the integration as simple as possible.
For snappify we went with the Overlay Checkout method because it seemed like a simpler way to integrate it into our UI. That means the following steps describe the process for integrating the Paddle Overlay Checkout, but I think it should be a pretty similar process for the Inline Checkout too.
Open the Paddle Overlay Checkout
When the user clicks on one the Upgrade buttons we execute the following code to open up the Paddle Overlay Checkout:
So first we have to check if the user is logged in. If not we just open up our login modal.
Then we activate the button loading state which also disables the button, just to prevent that the user can open up the the checkout modal several times.
We define a passthrough object, which gets passed to the Paddle Checkout. This is a very helpful object as it gets attached to the Paddle Subscription when the user completes the payment process. You can use it to identify any data for this specific subscription. In our case we just store the userId and also going to use it later to reference to this specific user.
We also define two callback methods for when the checkout was successful or the modal is being closed. Those are public functions and their names just get passed as a string to the Paddle.Checkout.open function. When the modal gets closed we just makes sure that the button loading state isn’t active anymore. If the payment succeeded, we redirect him to our purchase page where we thank him for being part of our journey and give him instructions on how to continue further - more on this later.
Next we call the Paddle.Checkout.open function which finally opens the payment modal for the user. Here we additionally pass the following parameters:
product- This is the Paddle id of the Subscription Plan you have configured in your Paddle Dashboard earlier. Here we distinguish between monthly and yearly subscriptions, depending on what the user has chosen in our UI.email- This is the email of your user so he doesn’t have to put it manually and you can easily identify them later. It will get stored in Paddle for the corresponding user.disableLogout- Actually the user could still logout on the Paddle modal by default and put in another email address, but that’s nothing we want him to do so we just disable it.- And the
passthrough,closeCallbackandsuccessCallbackparameters as mentioned above
Implement the payment-succeeded page
Now there are two things which can happen:
- The user aborts the payment process, which means that the
closeCallbackis being executed and he is again on our pricing page. - Or the user actually pays for our SaaS (yaaay 🥳) and the
successCallbackis being called, where we redirect him to/purchase.
At /purchase we have a simple page where we thank the user and tell him that it could take some minutes until he can access all of the paid features. Actually it should just take a few seconds, but just to be sure in case of any outages. 😅
Frontend wise everything should be good to go for the checkout process, now let’s have a look at the backend.
Make our backend ready for the Paddle Checkout
As the user completes the payment process on the Paddle side, our application needs to know when a user performed a specific action, like he purchased our product or cancelled his subscription. Therefore we need a REST endpoint where Paddle can inform us about such events via a webhook.
But before we go deeper into those webhooks and what we have to handle there, let’s first have a look at a basic database schema to store valuable informations about the user and his subscription state.
The database schema
I assume you already have a database table for your users. To keep things simple, let’s create a new user_payment_data table as a 1:1 relation for existing users.
The table should have the following columns:
userId- the id of the user which this data corresponds tosubscriptionId- the unique id of the subscription generated by PaddlesubscriptionPlanId- identifies which plan the user bought (in our case monthly or yearly subscription)subscriptionEndDate- the effective end date of the user’s subscription, it will be extended after a successful recurring paymentsubscriptionStatus- the current status of the subscription, you can have a look at the possible status values here: https://developer.paddle.com/reference/ZG9jOjI1MzU0MDI2-subscription-status-referencesubscriptionUpdateUrl- this url can be used later to let the user change his payment informationsubscriptionCancelUrl- this url can be used to let the user cancel his subscription
Although I only saw Paddle using numbers as their ids, I went for the safe side and also store them as varchar. Only the subscriptionEndDate (and probably your userId) isn’t stored as varchar, but instead as date for easier data operations later on.
Basically you have access to all your customers and their payment history via the Paddle Dashboard. Still we want to keep us the possibility to maybe show the payment history to every user in the future directly in snappify, therefore we also created a payment_history table with the following columns:
id- a uniquely generated id to identify each payment actioncreatedAt- to identify when the action was reporteduserId- the id of the user which this data corresponds tostatus- here we store eithersuccess,errororrefundedsubscriptionId- the corresponding Paddle subscriptionsubscriptionPaymentId- the id of the payment in PaddlesubscriptionPlanId- to store from which subscription plan this payment was made (yearly / monthly in our case)currency- which currency the customer used to payamount- the amount the customer paidamountTax- the amount of taxes which were paidpaddleFee- how much Paddle earned for the paymentpaymentMethod- which payment method was used (e.g. paypal)receiptUrl- the url where the customer can see the invoice for the paymentattemptNumber- for failed payments, we store how often it was already retriednextRetryDate- we also store when the next retry will take placerefundReason- for refunds we store the reasonrefundType- and the type we get from PaddlecustomerName- just for the record, we also store the name of the customer of the corresponding paymentuserCountry- plus the country where he’s coming from
Not all of the columns are required for each payment history entry. Later you’ll see how we fill this table on the specific events.
Create the REST endpoints
As Paddle needs to inform us asynchronously about changes, we need to provide them a REST endpoint where they can send us necessary informations. All of the Paddle events which we are handling in this tutorial are POST calls.
Before we go into the implementation of each event, you should make sure to secure your endpoint properly. Everyone could call your endpoint and for example give himself or everyone else a subscription for free or do other harmful actions. That’s why you should ensure that only Paddle is allowed to access your endpoint.
This can be done by only whitelisting Paddle server ip addresses + validating the signature which Paddle send you for every request and is encrypted with the Paddle Public Key which you can find in your Dashboard. I’ve prepared a Gist where you can see how we are validating each webhook call.
Handle the necessary Paddle Events
Now we have to take care to handle all the necessary events Paddle sends us when there’s an update to the subscription of a user. I’ve prepared another Gist with TypeScript types of all the events we want to handle so you can better see which data is being delivered from Paddle for each event. For each request we now cast the body to a PaddleRequest interface and also parse the passthrough object which gets sent for every event and lets us identify which user is affected by the event (this is what we passed to Paddle initially during the Checkout).
And now we can go through all possible events with a switch statement and handle each of them separately:
When an error occurs during the handling of our events, we return a 500 to Paddle, else it will always return 200 to tell Paddle that everything went fine.
Now let’s have a look how to handle the different events:
SubscriptionCreated
Wohoo, we got a new customer! 🥳 Let’s store all the necessary informations into our database:
SubscriptionUpdated
Paddle informs us about any updates to the subscription itself. Let’s trust them and update the database entry accordingly:
SubscriptionCancelled
Oh no, a user cancelled his subscription. 😢 We only need to update the status and the effective end date (he still has access until the end of the current period) of his subscription:
SubscriptionPaymentSucceeded
Oh yes, another payment coming in! This also happens when the period of an active subscription gets extended, e.g. the user approaches the next month of his monthly subscription. Therefore we also need to update the subscriptionEndDate in this case. For this event we also store an entry into our payment_history table.
SubscriptionPaymentFailed
Ouch! There was an error processing the payment of a customer. This happens when there were problems retrieving the money from the payment method of the user while extending the period of his subscription.
Paddle retries the payment for a configurable amount of time (in our case 3 times). We want the user to have access until the last retry has failed, therefore we update his endDate nevertheless + store an entry in the payment_history table:
SubscriptionPaymentRefunded
This event happens whenever a payment get refunded. We just store it as an info in our payment history table:
Configure the Webhook in the Paddle Dashboard
So now that we have created the REST endpoint and are handling all the necessary events there, we need to tell Paddle where they can reach us and which events they should inform us about.
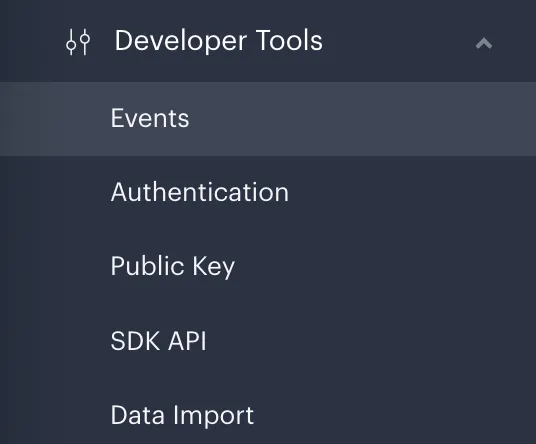
Let’s head to the Dashboard and go to “Developer Tools” → “Events” to configure it!
Hint: you also have to do those configurations separately on the Sandbox and Production environment.
Configure your REST endpoint and email address
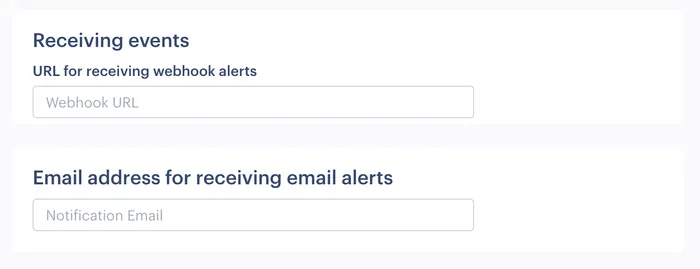
The first step is to tell Paddle where they can inform you about changes. Therefore you can configure an URL (which should point to your REST endpoint) plus an email address, which is pretty nice if you want to get informed about new or cancelled customers.
Subscribe to necessary events
The next step is to define for which events you want to be informed about. The only thing which is a requirement is to check all the “Webhook” events for Subscriptions, so that our endpoint will receive updates from those events. Additionally you can choose the events you want to get a notification via email.
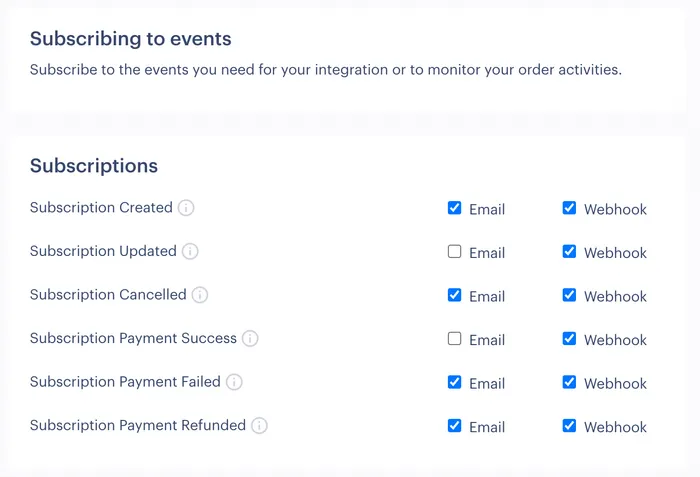
Note: The other sections below are not necessary to check via Webhook, as we also have no implementation for them. But you might be interested into getting informed via email e.g. when a new Payout happens or a dispute is created.
Testing events locally
In order to test the implementation of your REST endpoint, Paddle has a Webhook Simulator where you can send test events to a specific URL and see if the implementation works as expected.
Just head over to https://vendors.paddle.com/webhook-alert-test
Retry failed webhook events
Of course it can happen, that Paddle can somehow not contact your REST endpoint. Maybe you currently experience a downtime for example. Paddle will retry the REST call 3 times and afterwards mark it as failed.
You can have an over about all the events Paddle sent to you and even retry failed events from there manually: https://vendors.paddle.com/webhook/alerts
Let the user manage his subscription in the frontend
So now that we have the events configured in the Paddle Dashboard, let’s move on with the last thing we have to implement in our frontend: give the user the possibility to manage his subscription.
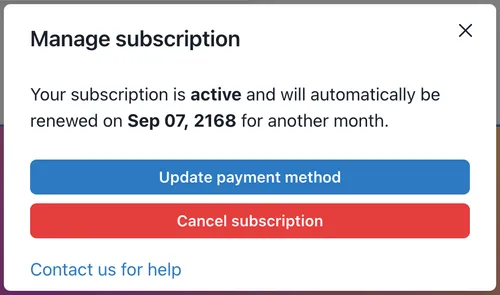
We kept the view in snappify pretty simple. The user sees the current status of his subscription, when it will be renewed and has two buttons to either update his payment method or cancel his subscription.
Update payment method
When the user clicks on the “Update payment method” button we execute the following code:
Here you can see that we again call the Paddle.Checkout.open function and provide the updateUrl which we stored in our database for the specific user to the override parameter. This opens up a new modal where the user is able to update his payment infos.
Cancel subscription
When the user clicks on the cancel button, we’ll inform him that his subscription will still stay active until the end of the period, but that he will loose access to his content afterwards.
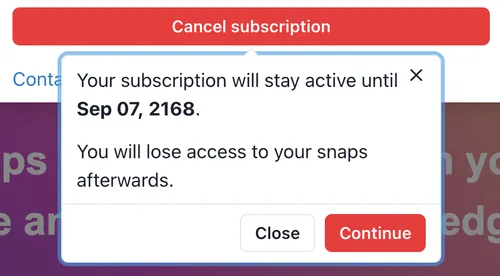
When he clicks on continue we execute the following code to open the Paddle Cancel modal, very similar to the update modal previously:
Afterwards he will see the updated view:
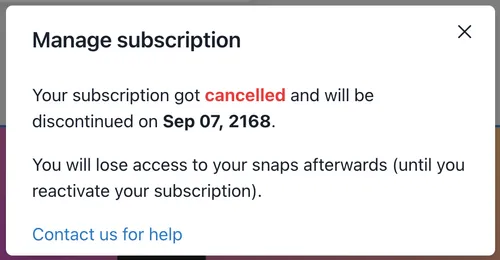
What if the user wants to continue after cancellation?
As you see in the view above, the user doesn’t have the possibility to reactivate his subscription once he cancelled. Sadly I couldn’t find an easy way to achieve this with Paddle, hence the user has to wait for his subscription to end, to subscribe again afterwards.
If you know a good way on how to implement this, I’d appreciate your feedback! 😄
When payments fail
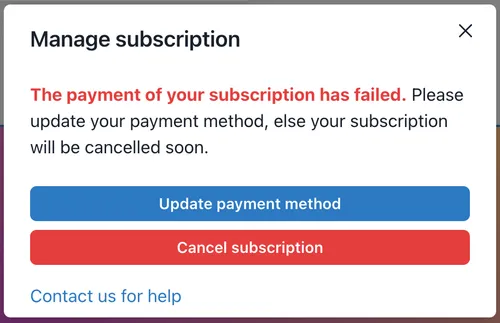
Of course it can also happen that recurring payments fail due to any reason. When this happens, paddle will send us an event which updates the state of the subscription to “past_due”. Paddle will retry the payment (you can configure in the Dashboard how often it should be retried) before the subscription will be cancelled.
We also implemented a separate text in the subscription modal if the subscription of the user is in the “past_due” state:
Let’s get production ready
Good news: we’re done with the implementation part! 🥳
Now I just want to mention some Paddle settings you have to make before going into production.
Payout Settings
At “Business Account” → “Payouts” → “Payout Settings” you can configure all the necessary settings for your Payouts. Make sure all the information you provide is correct as this is also the data which is going to be on your invoices you retrieve from Paddle.
Retrieving Invoices
On the same page, when you switch to the “Payouts Sent” tab, you can see all the Payouts you received from Paddle and are able to download the Invoices for each as PDF. Paddle splits your invoices into two different ones: ones for the payments which were made from the US and one for the “Rest of the World” - be sure to gather both.
Balance Currency
On the “Payout Settings” you could configure the Transfer Currency, but by default the payments on your Paddle account which weren’t paid out yet, would still be in USD by default.
You can head to “Business Account” → “Balance Currency” if you want to change that.
Recover Settings
Last but not least, Paddle has a feature to recover the Checkout session from a user. For example if the user already opened the Paddle Checkout of your product, but didn’t buy your product in the end, you can configure Paddle to send him an E-Mail and remind him that he didn’t complete the Checkout yet with a link to recover it.
Paddle takes a commission fee for those recovered Checkout purchases and you can see all the settings (e.g. applying a discount for those users) at “Recover” → “Recover Settings”.
The End
Phew! We did it, we setup Paddle as the payment provider of our SaaS! 🥳
I hope this blog post helped you to gain a better overview about the Paddle integration and to consider several edge cases.
If there’s something unclear or things you’d add to this article, please don’t hesitate to reach out to me via Twitter. I’d absolutely appreciate your feedback!
Cheers 👋