How to deploy your web applications online

There are so many online platforms for deploying your applications online. If you are a programmer then this is a technical area in that you must have experience. Having your application running locally on http://localhost:3000 is fine for development purposes when you are still testing your application. This changes however when the time comes for your application to be ready for production. It will need to be hosted on an online platform so that clients and the world can access it.
Heroku used to be an amazing FREE platform for deploying your applications online. It supports many of the most popular programming languages like:
- JavaScript
- Ruby
- Java
- PHP
- Python
- Go
- Scala
- Clojure
For beginner programmers and those who are just transitioning into tech the Heroku platform was a very good place to host your applications. Unfortunately, Heroku has now become pay-to-win. The services are behind a paywall so it’s not free to use anymore which takes away its value for being one of the top tier free platforms to use.
Starting November 28th, 2022, free Heroku Dynos, free Heroku Postgres, and free Heroku Data for Redis® will no longer be available. If you have apps using any of these resources, you must upgrade to paid plans by this date to ensure your apps continue to run and to retain your data.
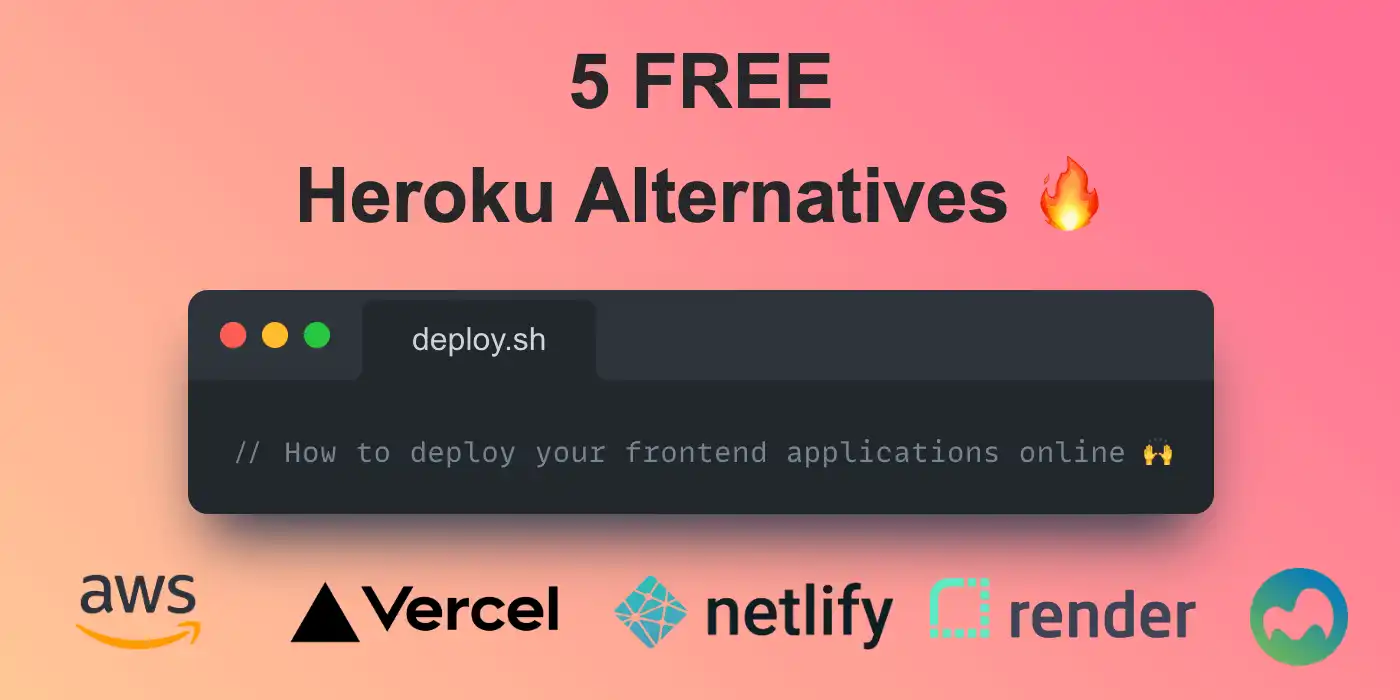
In this article, we will learn about 5 FREE Heroku alternatives and how to deploy the front-end for your JavaScript applications to these platforms. Some of these platforms do support other programming languages and frameworks but for simplicity’s sake, we will stick with JavaScript and React applications. It is even possible to deploy back-end applications to some of them too. The list is completely unordered and is not listed by rank.
Prerequisites
For this tutorial, we will be using the JavaScript framework React and the package manager npm. However in theory it should be a fairly similar setup if you wanted to use another JavaScript framework like Vue, Angular or Svelte. You might need to install these libraries and frameworks before you can use them, however.
Three of the most popular React build tools are Next.js, Vite.js and create-react-app. I will be using Next.js mostly but you can use whichever one you want. We just need a basic boilerplate app so we can try out all of the online platforms.
Create a folder on your desktop called deployment and cd into it. Now run the commands below to create a React application using Next.js.
Give the application the name of my-app and run the commands below to complete the setup and get the app running locally on the development server http://localhost:3000.
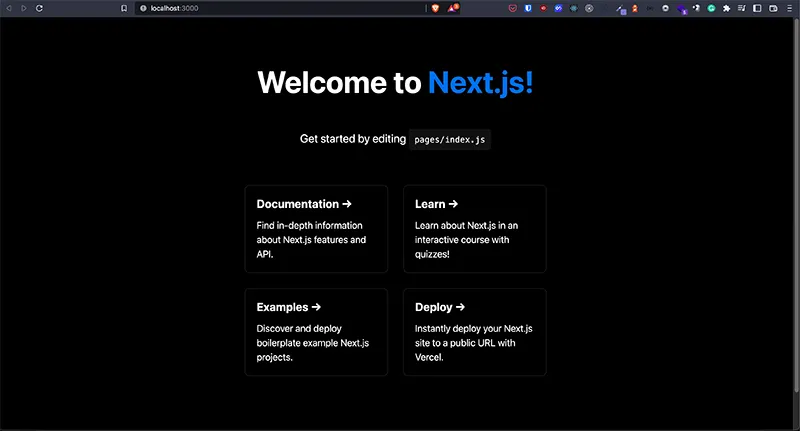
If you go to http://localhost:3000 you should see the default Next.js project application home screen running in your browser.
Some platforms will require the static version of your application so it is a good idea to create a build version as well which just has the static files and not the entire application. This is very easy to do just run the commands below to create a build directory which Next.js calls .next. Stop the development server from running and then run the commands below.
Now you should see the exact same screen however it is now using the build files (HTML, CSS, and JS files) and the production server.
Deploying your applications online
Before we try to deploy our applications to different platforms lets first put it on GitHub. Many of these platforms will let you import an existing project from GitHub so it is in our best interests to have the codebase on GitHub now.
Go to GitHub and create a new repository for this project and give it the name deployment-practice.
Use the command line to navigate inside of your my-app folder. You should be inside of the folder that has the node_modules folder. Next run the commands below inside of that folder. (Be sure to add the correct URL to your GitHub repository).
Refresh your browser window with the GitHub page and you should see your newly created repository and the Next.js codebase which we created earlier.
1. Netlify deployment
Firstly create an account on Netlify.
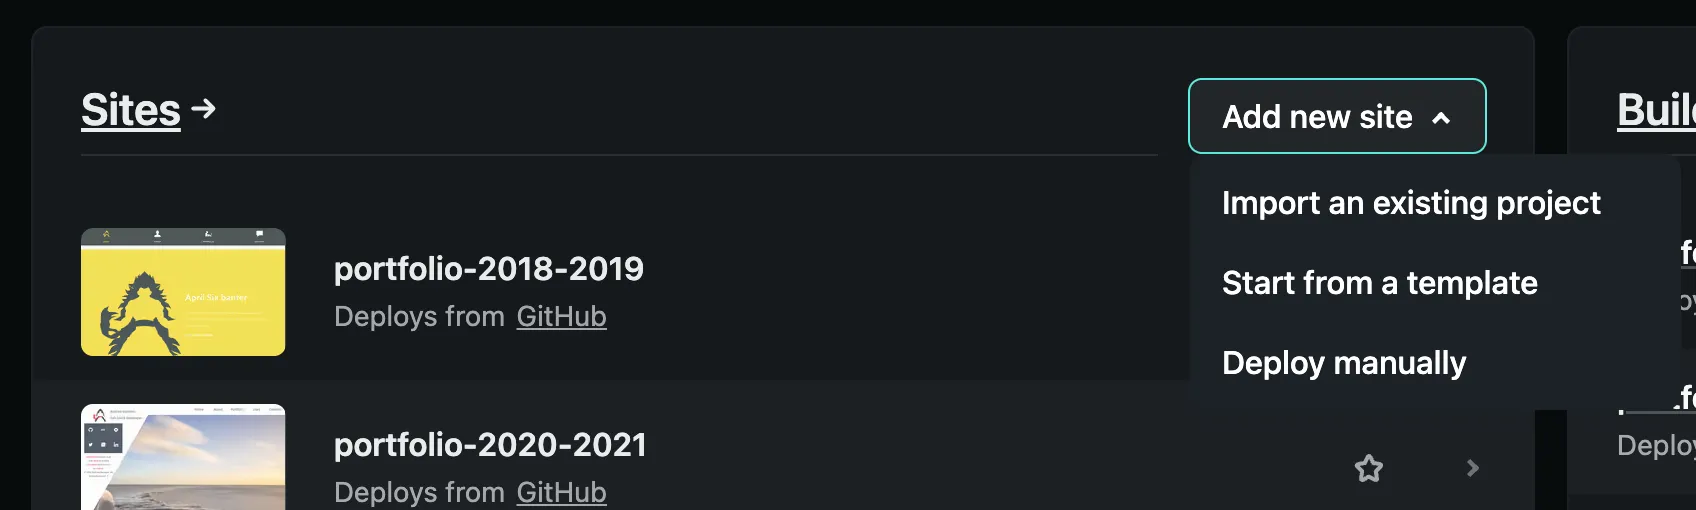
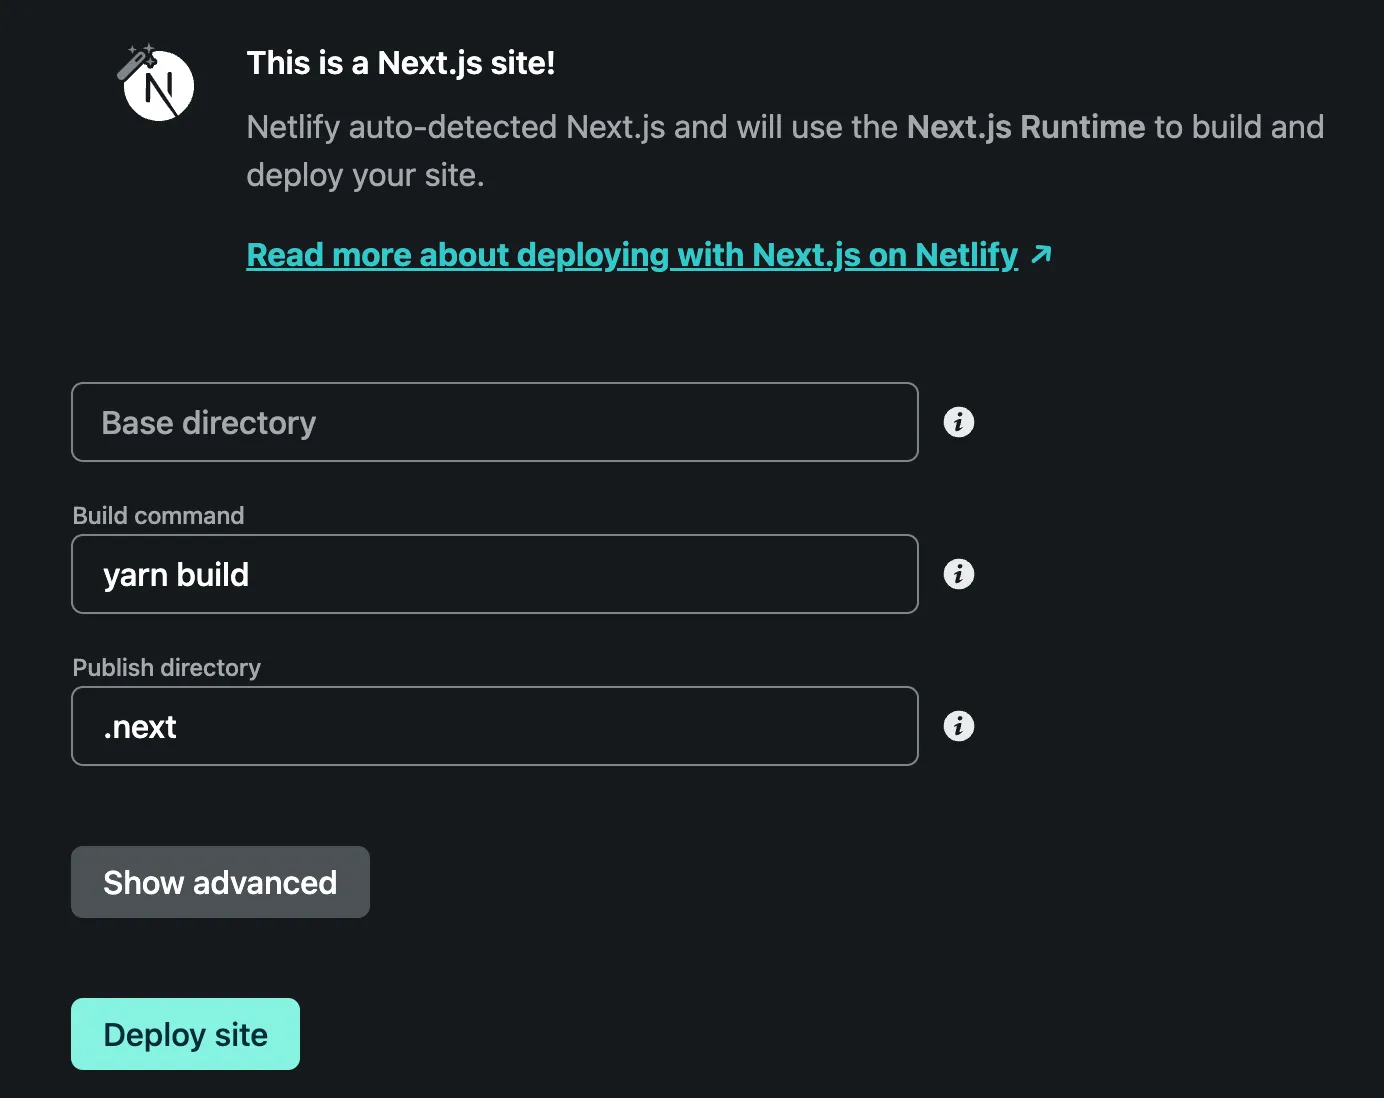
Go to you dashboard screen and then click the add new site button. Select the option to Import an existing project and follow the setup screens.
Deploy your application by clicking on the deploy button on the deployment screen. When the deployment is complete you will get a url for your web application. Clicking on the link should bring up your application online.
2. Vercel deployment
Firstly create an account on Vercel.
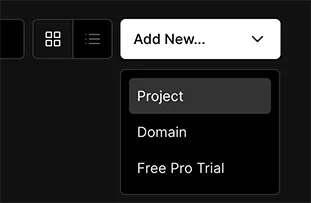
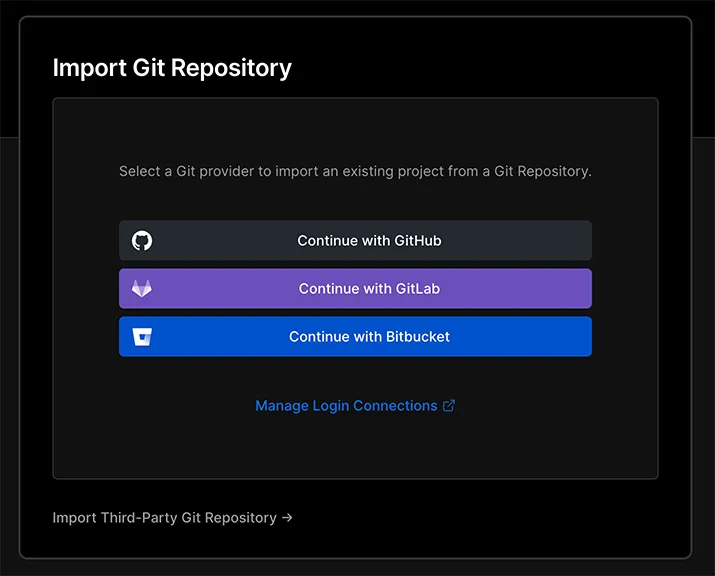
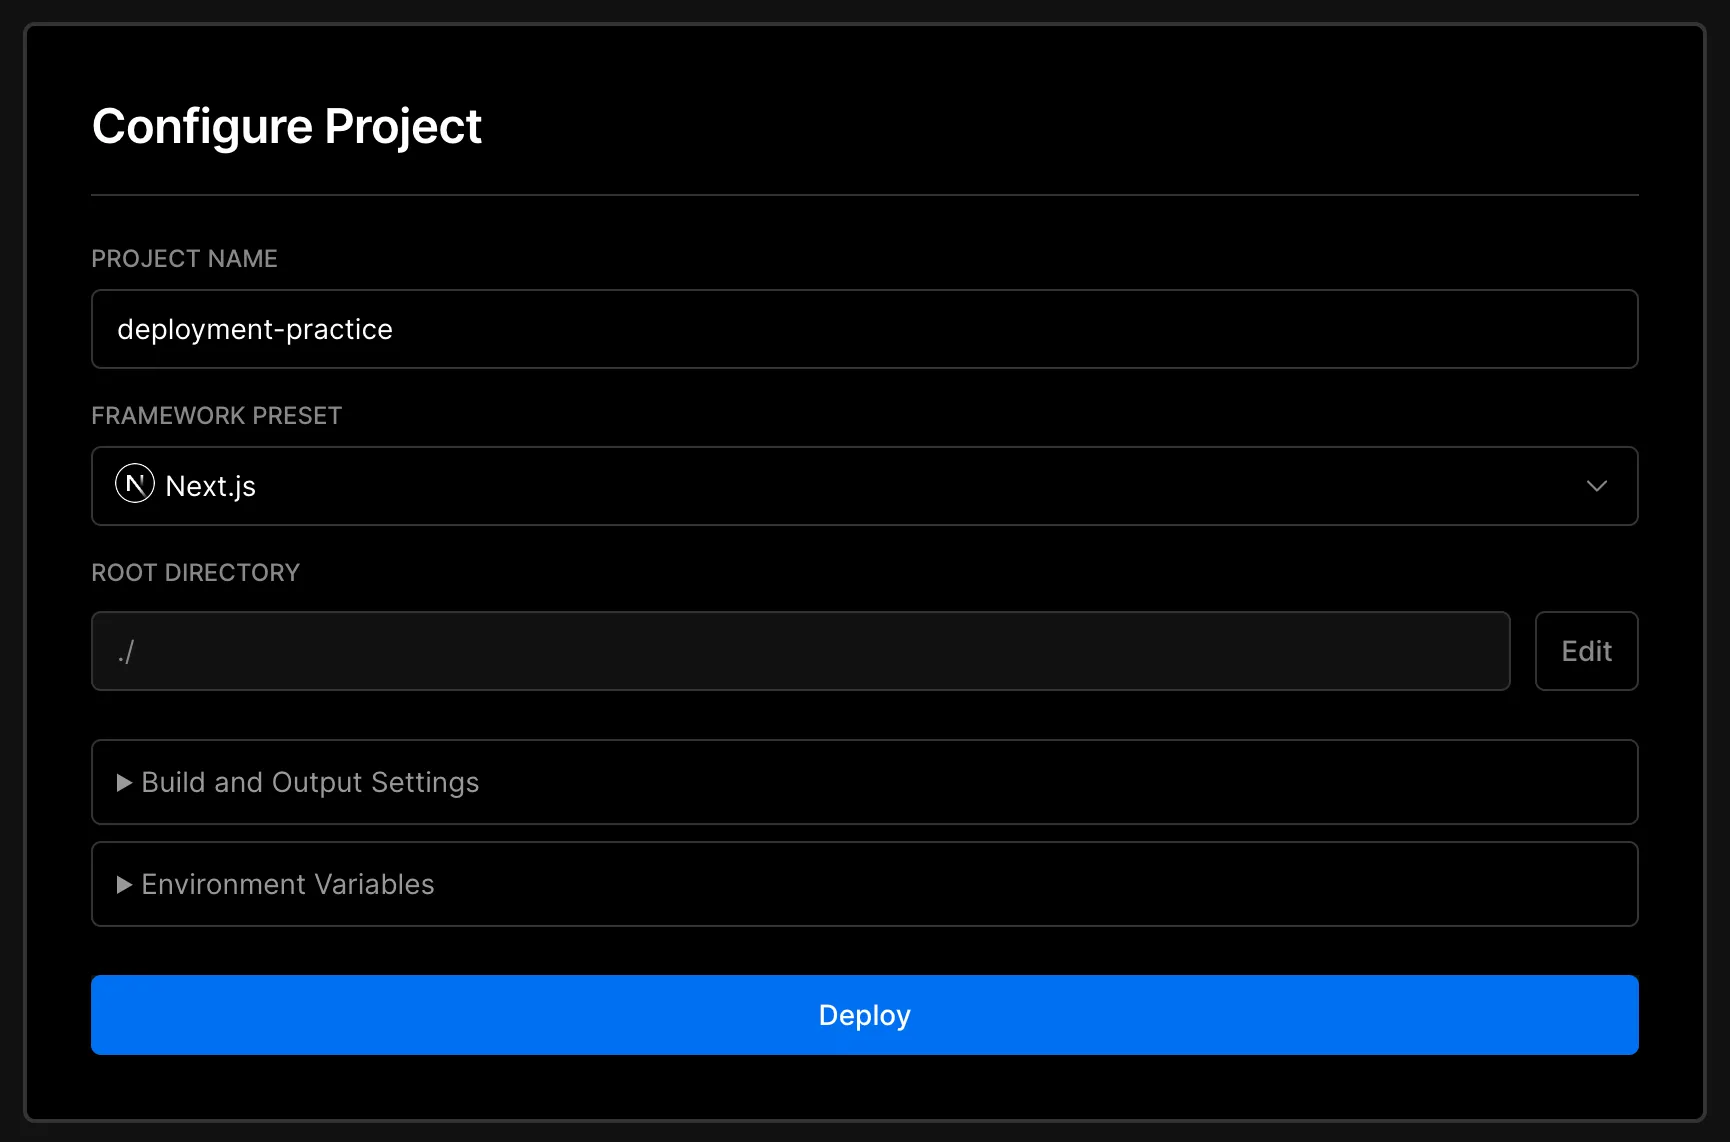
Go to you dashboard screen and then click the Add New… button. Select the option for Project and follow the setup screens.
When you reach the deployment screen click the Deploy button and wait for the setup to complete. You should then see a link to your website which has now been deployed on Vercel.
3. AWS deployment
Firstly create an account on Amazon AWS.
This time we are going to use Vite.js for creating a React application. The reason why we won’t be using Next.js for this example is because we will be using an Amazon S3 bucket and that requires an index.html page to be generated. Running the command npm run build will create a build folder called .next but it wont have an index.html file which is needed here. And the same applies when you use Static HTML Export.
Fortunately it’s pretty fast to create a React project using Vite.js. Use the command line to navigate to the root directory inside of the deployment folder we created. Now run the commands below to create a React project using Vite.js.
Give the project a name of my-app-vite and choose React as the framework. Select either JavaScript or TypeScript. Now run these commands to complete the setup and start the application.
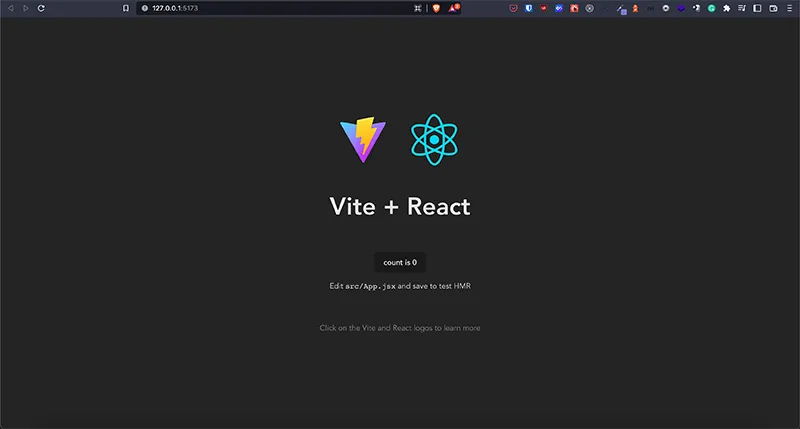
Your app should be running locally on http://localhost:5173/.
Lastly run the command npm run build to create a build folder called dist. This folder will have an index.html file and other static assets which is exactly what we need. You can even run the static website files in the dist folder using a server like serve if you have it installed so you can see it running in the browser. While inside of the folder my-app-vite run the command from the command line.
Alternatively and as a bonus if you have Python installed you can use that as well to run static local files! For example I have Python 3 installed so if I wanted to create a HTTP server to serve some local files I would first cd into its root directory and then run a command. So in this case cd into the root of the dist folder and then run the command below.
If you open up a web browser and go to http://localhost:8000 the app should be running locally on your machine! I am using a Mac and the command might be slightly different for Windows or Linux but you can google it and figure it out.
Now we can finally concentrate on the AWS part of this tutorial. First, there is something important that you need to be aware of. AWS does have FREE tiers however you could have to pay it depends on your usage so be careful. They say:
With S3, there are no minimum fees. You only pay for what you use. Prices are based on the location of your S3 bucket.
It should be fine for this simple example if your application is more complex and uses a lot of data or requires 3rd party APIs that could be different. Read the documentation, terms and pricing and make sure you know what you are doing before you get started because you don’t want to accidentally get billed a lot of money.
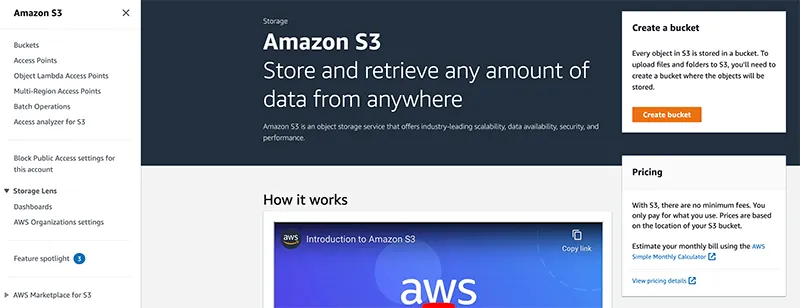
Navigate to the Amazon S3 page and create a bucket. It is highly likely that the website might have a different design because as you know websites change all the time but you should still be able to find the create a bucket link or button.
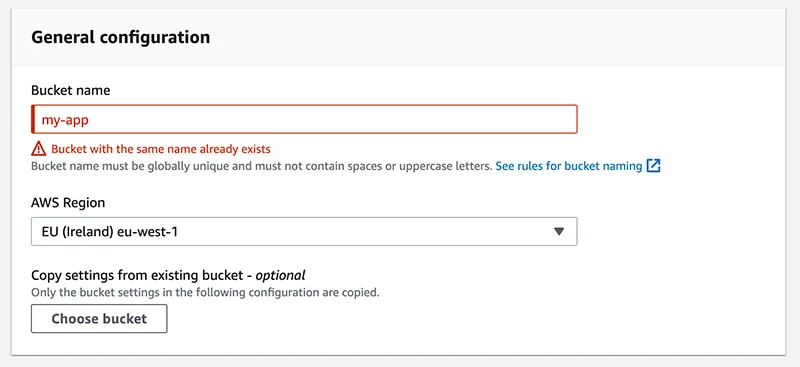
When creating a name for your bucket ensure that it is globally unique. You can’t use a name that someone else did otherwise you will get an error because it’s duplication and not unique.
Bucket name must be globally unique and must not contain spaces or uppercase letters.
Select the settings below.
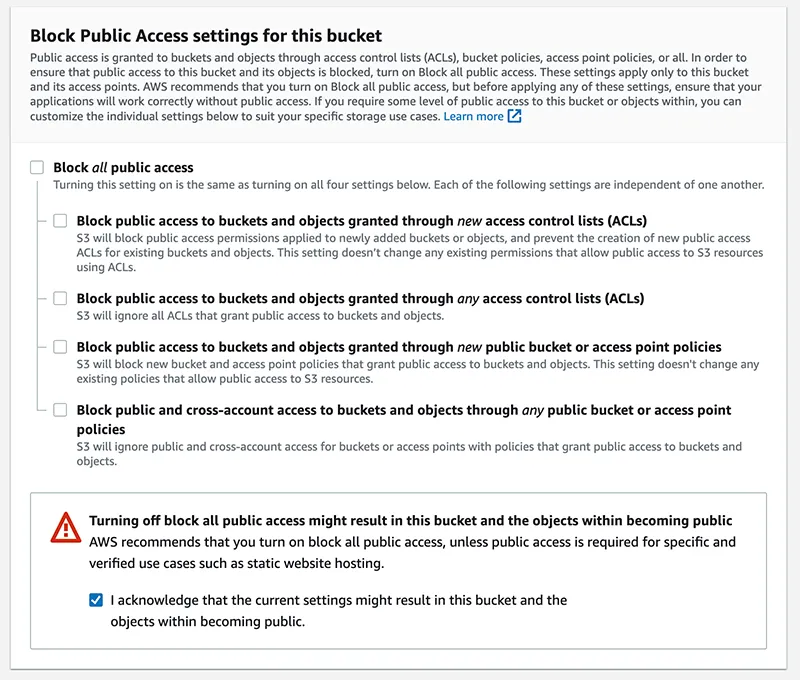
The rest of the settings should be fine as default so create a bucket.

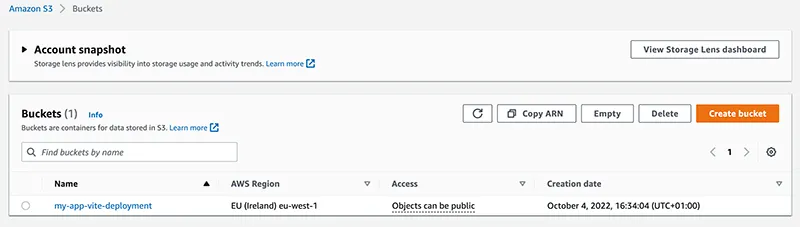
You should now be on a screen that looks similar to the one below which shows your S3 bucket.
Click on your bucket name and find the tab for properties. Now scroll until you find the Static website hosting section. I found it at the bottom of the page.

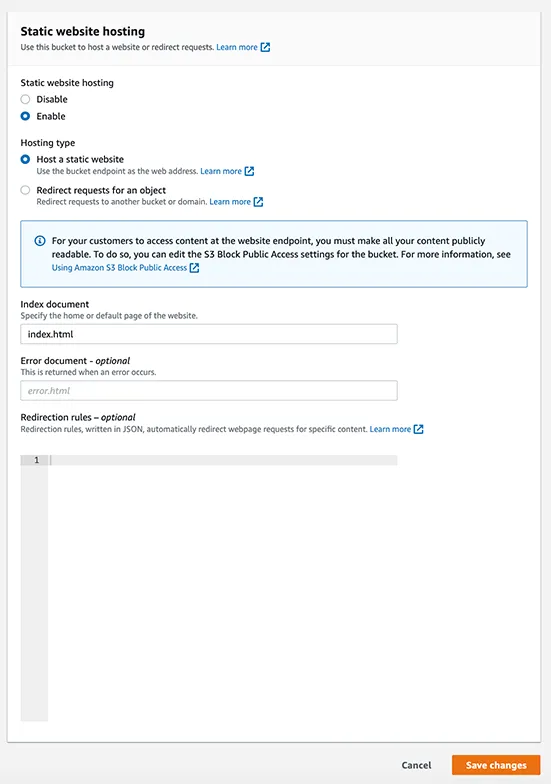
Click on the edit button and then select the configuration below. Make sure that static website hosting is enabled and the index document is set to index.html. Now save changes.
We are almost done there is just one step left we need to adjust the permissions so that we can get our application to show up publicly online. Click on the permissions tab and scroll down to the Bucket policy section and click the edit button.
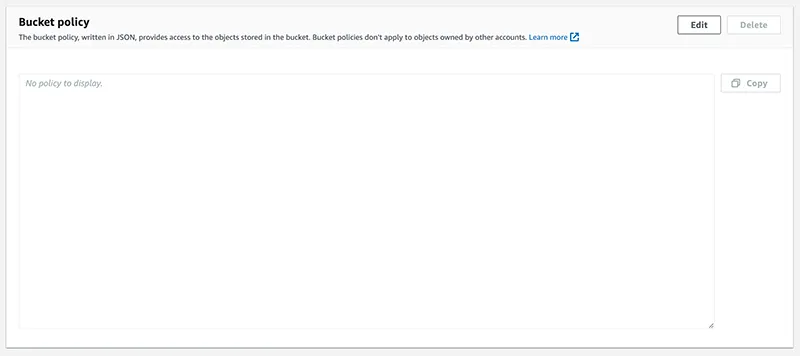
Copy and paste the JSON object code but change the resource key-value pair to be the name of your Amazon S3 bucket.
Copy this code but change the resource key-value pair name.
Click on the save button to save the changes. Let’s now navigate to the Objects tab.
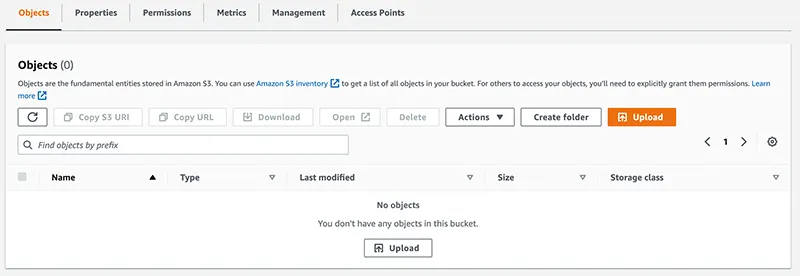
Go to the dist folder inside of your my-app-vite project and then drag and drop or upload all of the files to that page. Make sure that it is the contents of the dist folder and not the dist folder itself because the root file needs to be index.html it must not be inside of a folder. Click the button to upload the files and go back to the main screen.
Once again click on the tab for properties and scroll until you find Static website hosting. There should be a URL for your application if you click on it then your application should be live on Amazon S3!
4. Render deployment
Firstly create an account on Render.
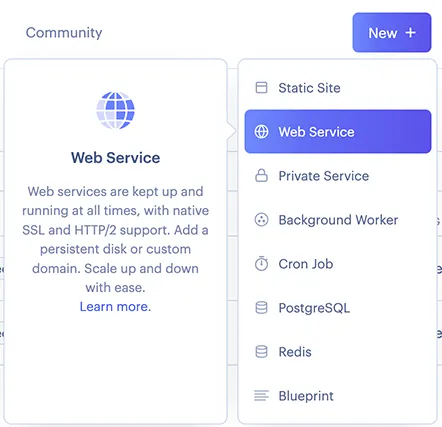
After your account has been created you should now be on the dashboard page. Click on the New button and choose the selection for a Web Service. You will probably need to connect your GitHub account so find the repository we created earlier and connect to it.
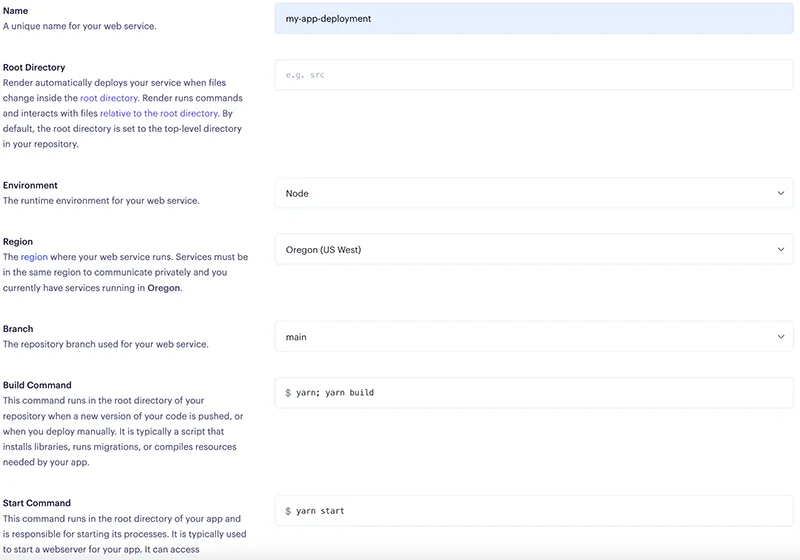
See an example configuration below for the repository. Give it a name and then you can choose any region you want just make sure that it has these settings.
Environment: Node
Branch: main or master depending on what you called it
Build Command: yarn; yarn build
Start Command: yarn start
Select the free plan and then scroll to the bottom and click on the Create Web Service button.
Wait for the build to complete and then click on the URL and you should see your application deployed online and working on Render. Please be aware that the free plan does have limits similar to how Heroku was.
Web Services on the free plan are automatically spun down after 15 minutes of inactivity. When a new request for a free service comes in, Render spins it up again so it can process the request. This can cause a response delay of up to 30 seconds for the first request that comes in after a period of inactivity.
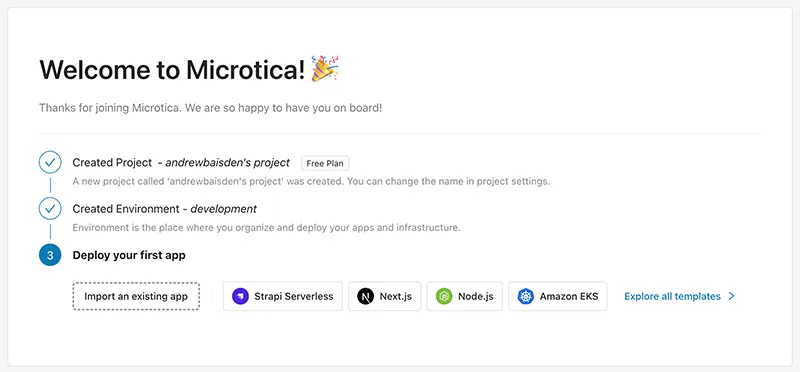
5. Microtica deployment
Firstly create an account on Microtica.
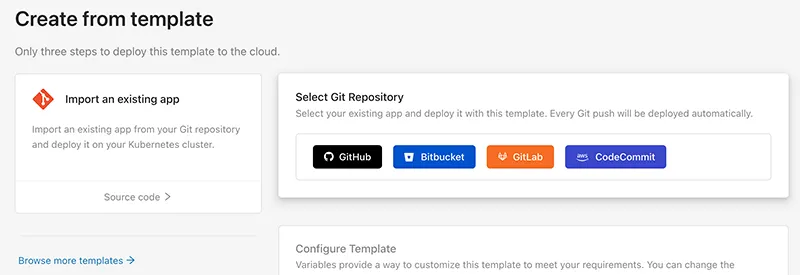
Then choose to import an existing app.
Select a GitHub repository.
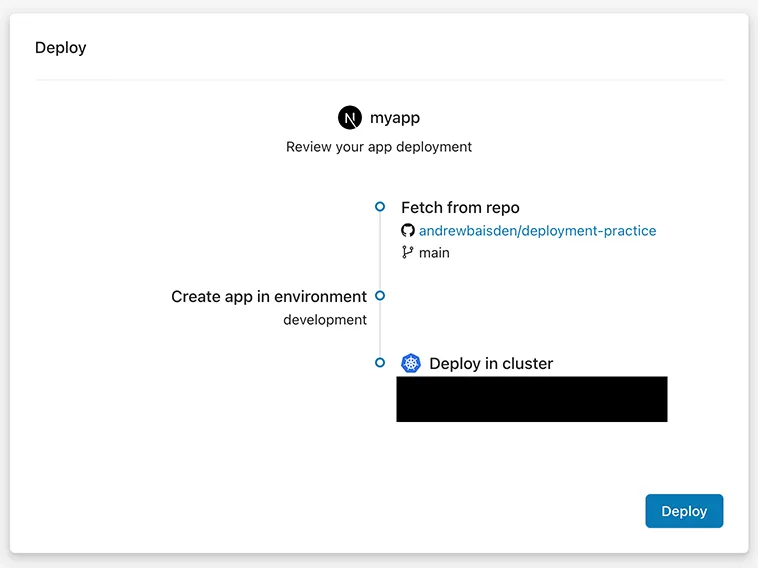
Find the repository you created for this project and fill in the information as shown below. Choosing NextJS as the framework should automatically fill in the build spec details. Give your app a name and then save it.
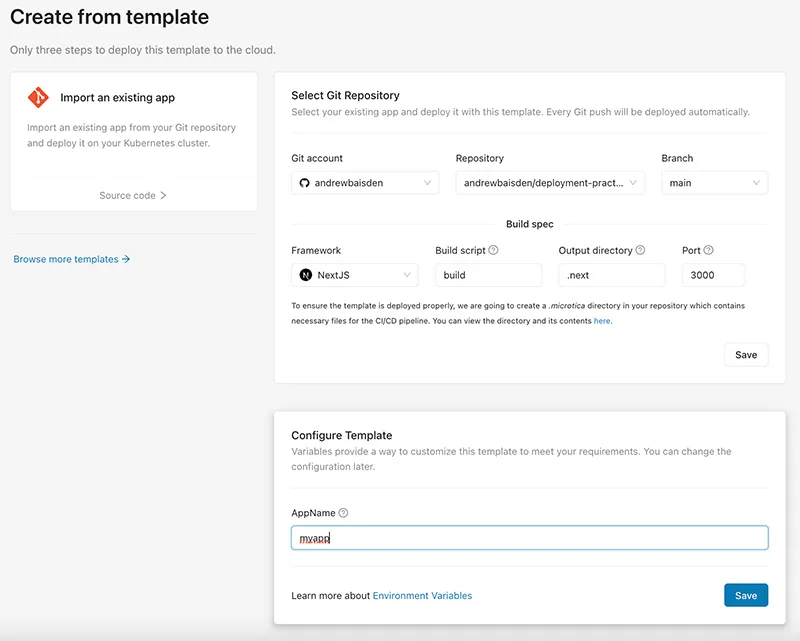
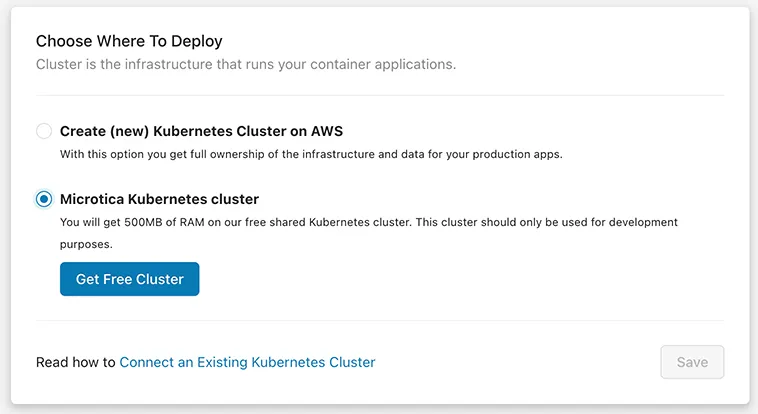
For deployment select Microtica Kubernetes cluster because its free.
Lastly, at the bottom, you will find the button for deployment. Wait for the build to complete and then you should have a link that will take you to your live app deployed on Microtica.
Final thoughts
So today we learned how to deploy a React front-end to various online platforms and as you can see it is not that challenging. We went through a few online platforms but there are many more out there that you can use. You just need to read through the documentation on how to use each platform.
Check out this list below to see other cool FREE Heroku alternatives for deploying front-end, back-end and full-stack applications.
List of deployment platforms
- Adaptable.io
- Appliku
- AWS
- Back4app
- CapRover
- Cloudflare Pages
- Coherence
- Coolify
- Cyclic
- Deta
- Digital Ocean
- Dokku
- Firebase
- Fleek
- Fly
- Gigalixir
- GitHub Pages
- Google App Engine
- HarperDB
- Koyeb
- Meteor Cloud
- Microtica
- MongoDB
- Napkin
- Netlify
- Northflank
- Patr
- Qoddi
- Qovery
- Railway
- Render.com
- Supabase
- Surge
- Vercel